Domicile
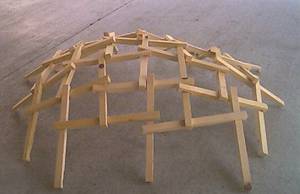
Here is a way that you can build a structure from almost any sticks you can get find, and they don't even have to be exactly the same length.
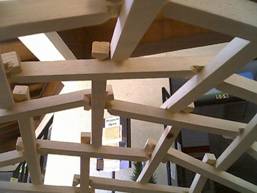
There's only one rule to putting it together: The end of each stick rests upon the center of another stick (except for ends that rest on the ground). For additional security, tie or wire the ends in place.
This technology offers an opportunity for those who have no option but to live outside. If they have the blessing of at least owning a tent, two or three months of full sunshine and constant use is likely to seriously damage it. By building a canopy using this structure, and covering it with anything that could be found or recycled, shade could be provided to protect it from sunlight.
If scraps of water-resistant materials could be found it could be “shingled” to protect it from rain, so it could provide living space to reduce wear on the tent. In a more dire situation, it could become the emergency shelter in itself,
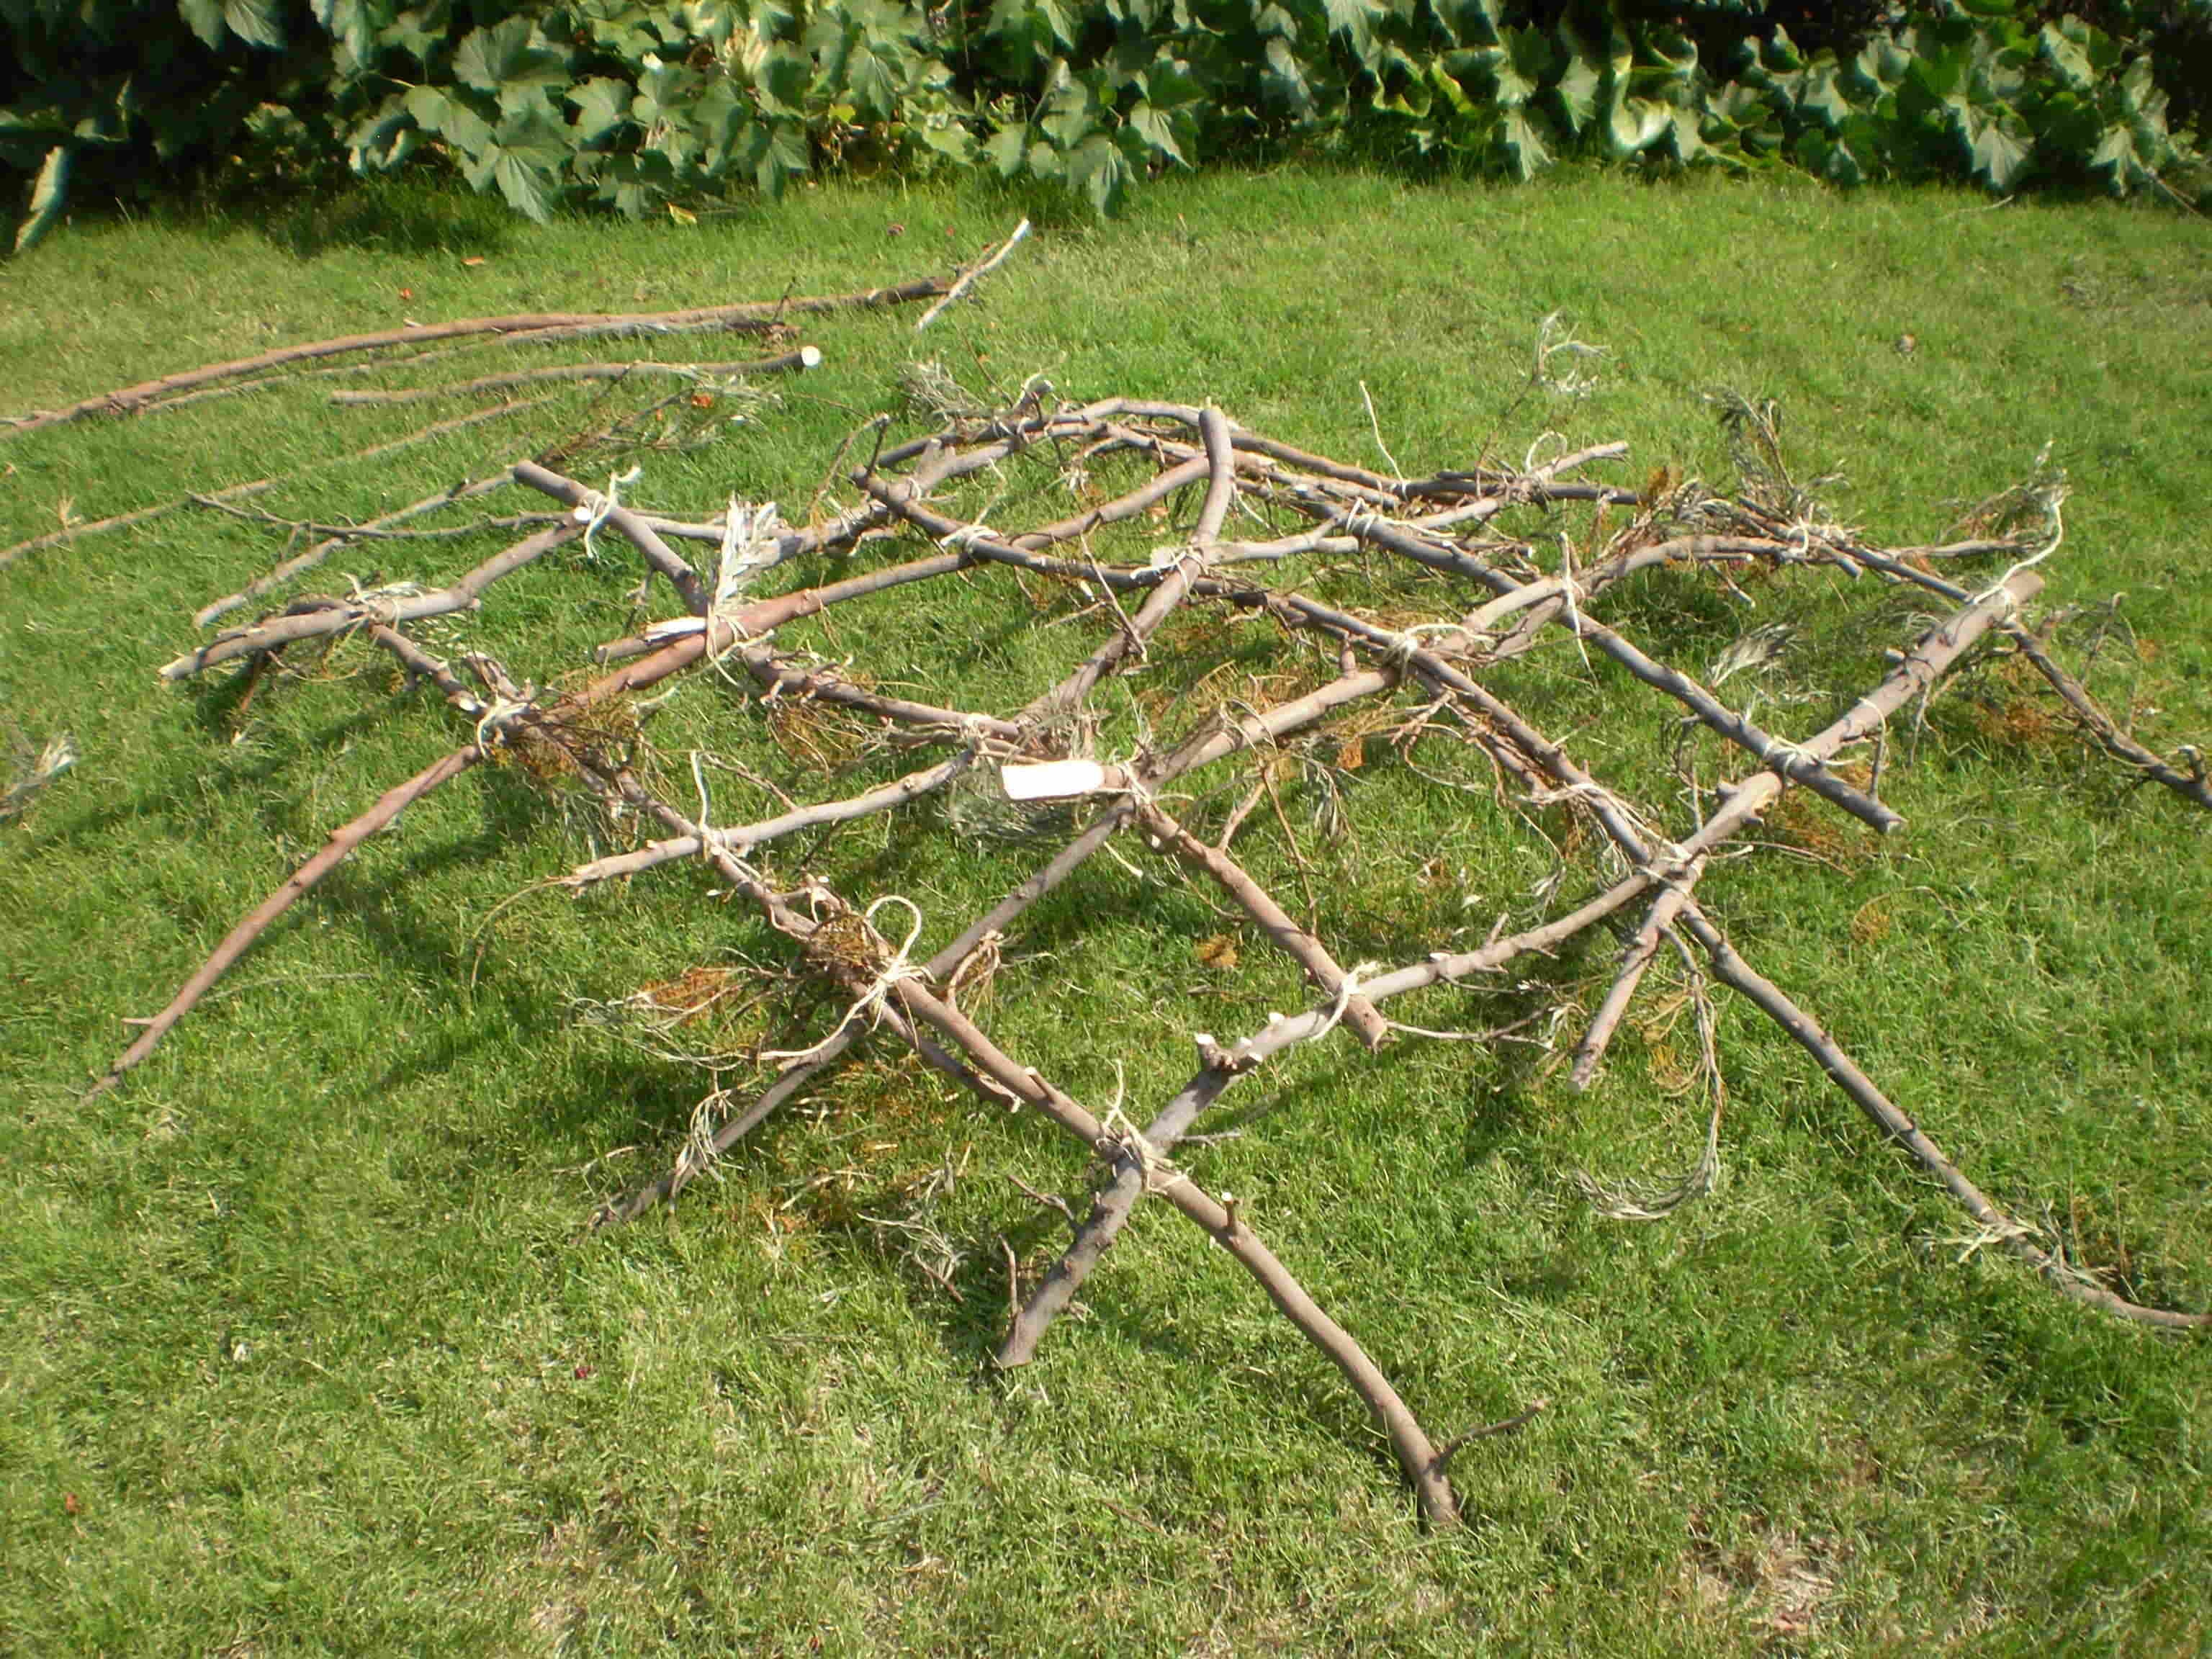
To demonstrate the minimal level of materials needed for a basic structure, I salvaged twigs from a branch that had fallen on a friend's shop. The photo below shows the bundle of twigs beside a sandal to indicate the size, and about 60 feet of twine that will tie them together.
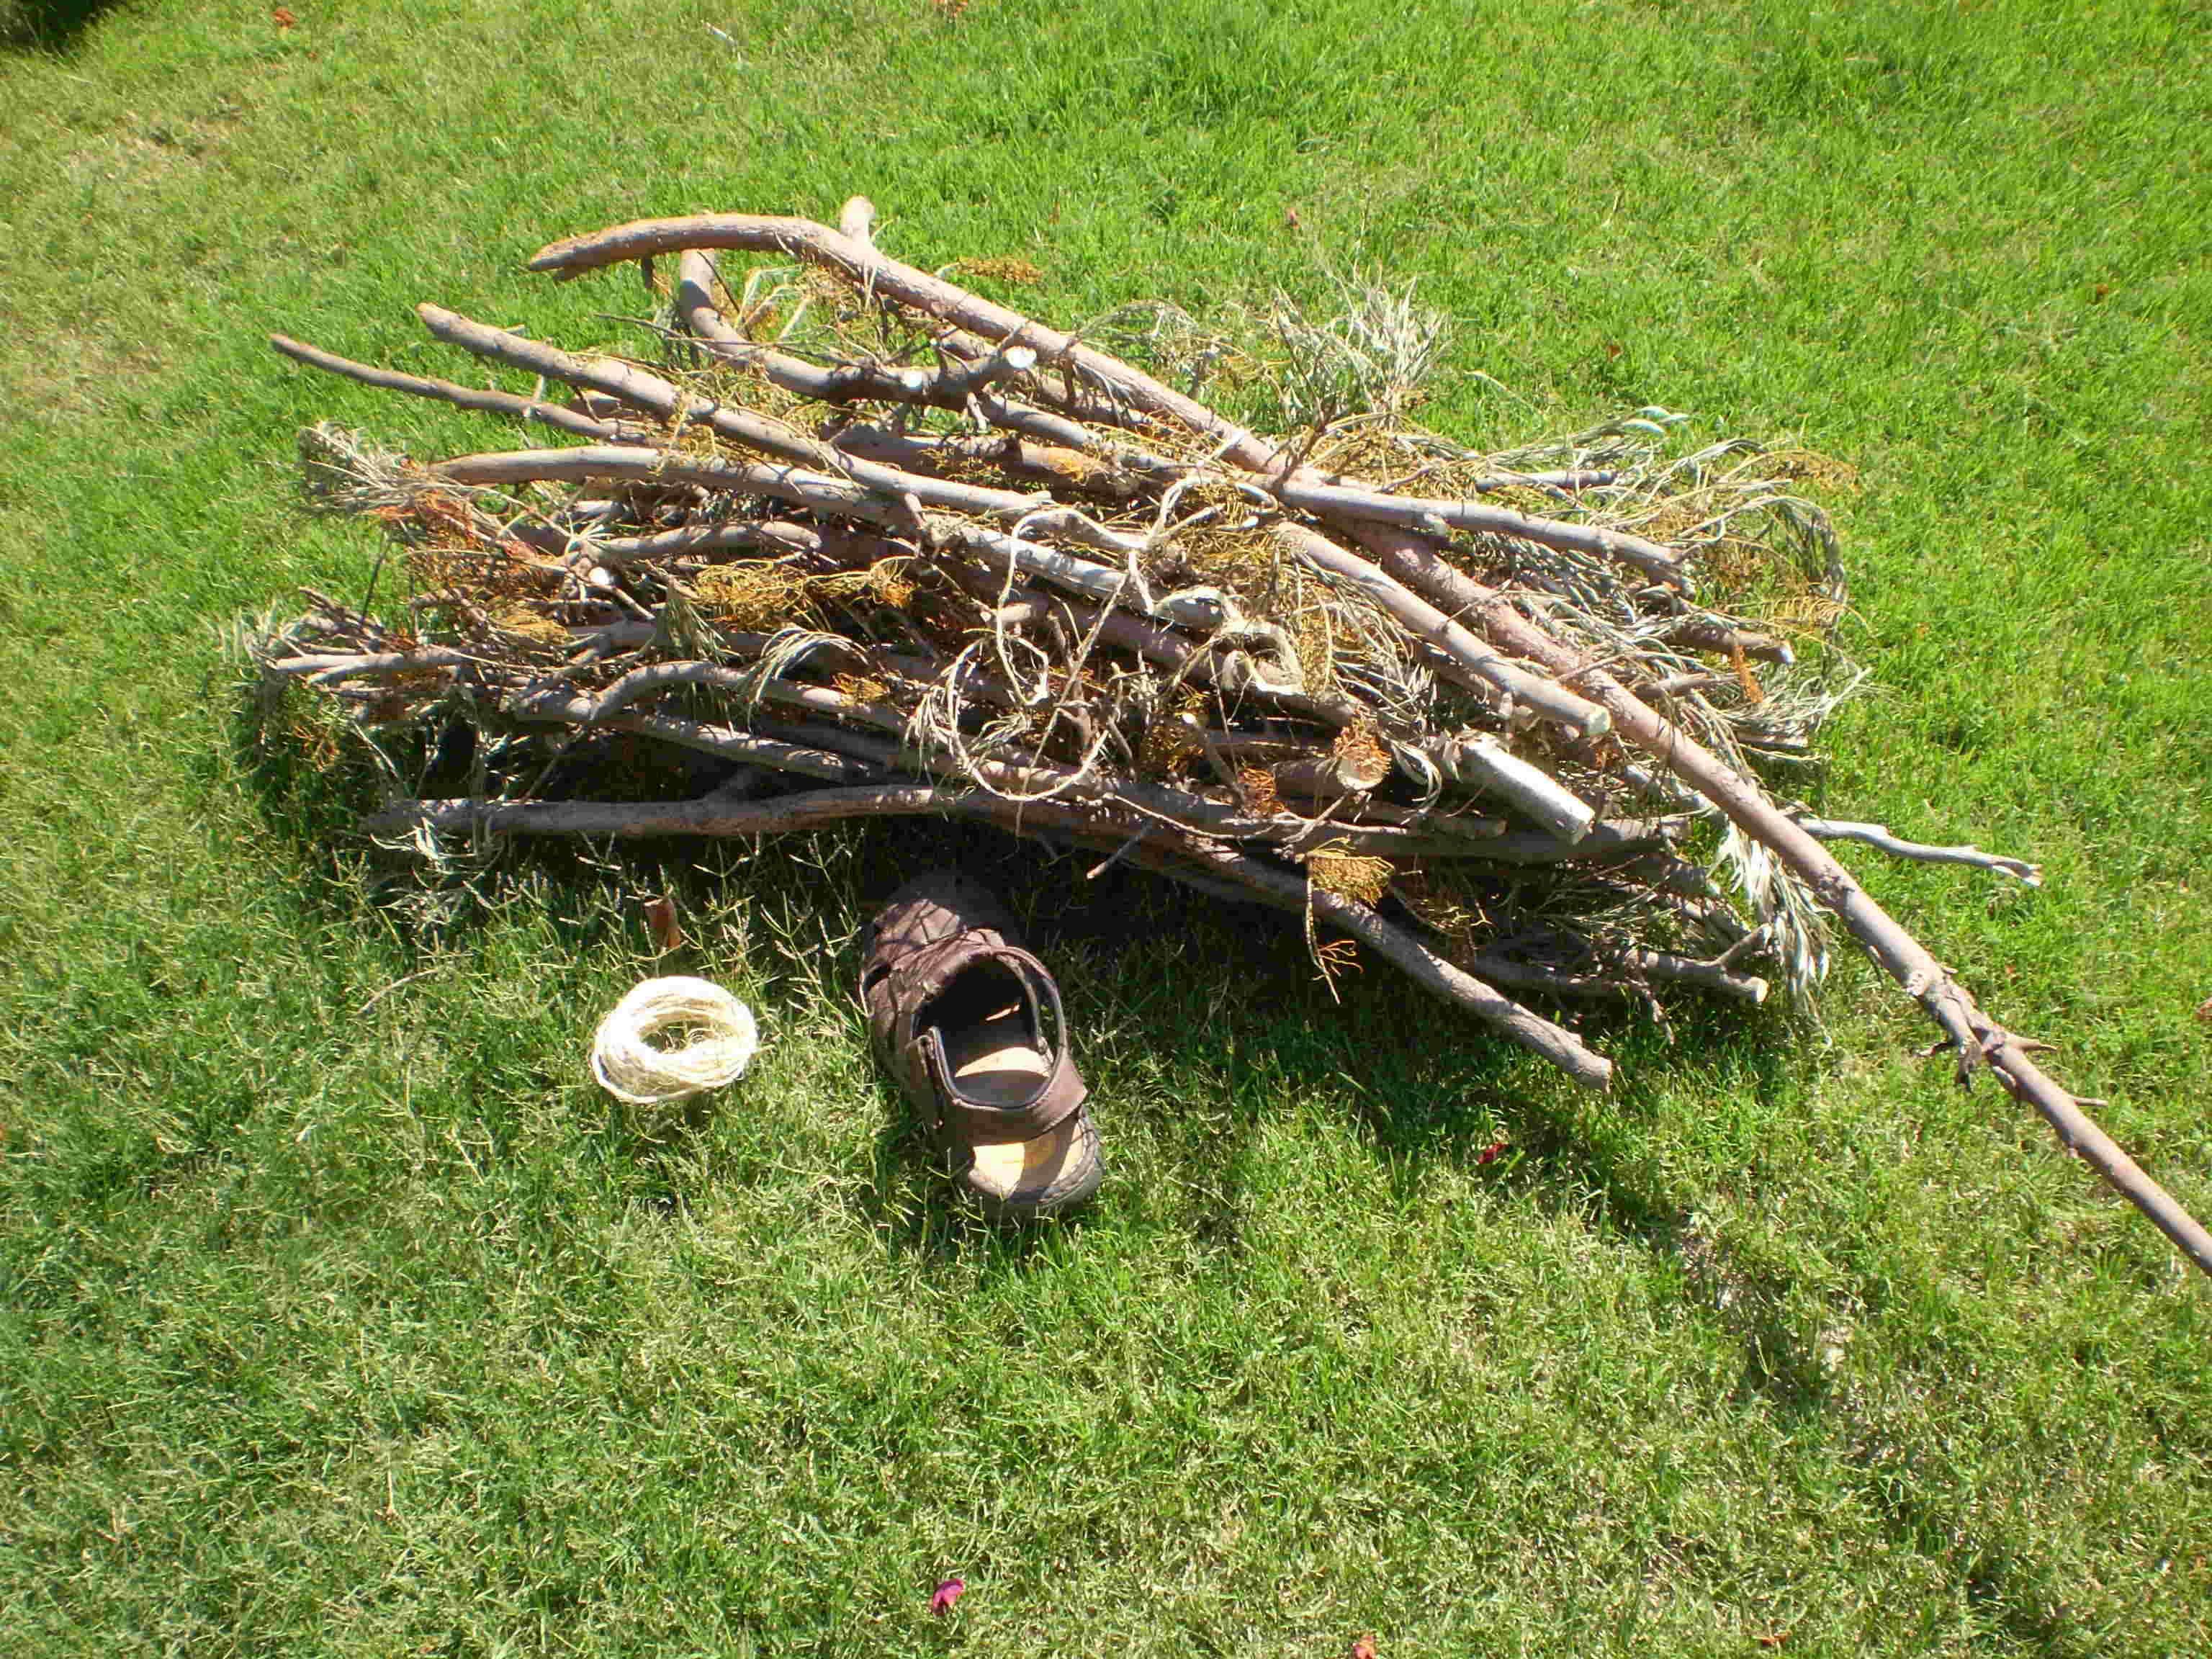
When I laid out the variously twisted twigs per the format described above, the result was a slightly ordered mess. Natural fibers such as jute and sisal are ideal for this application because they are cheap and are superior to synthetic materials in resisting sunlight.
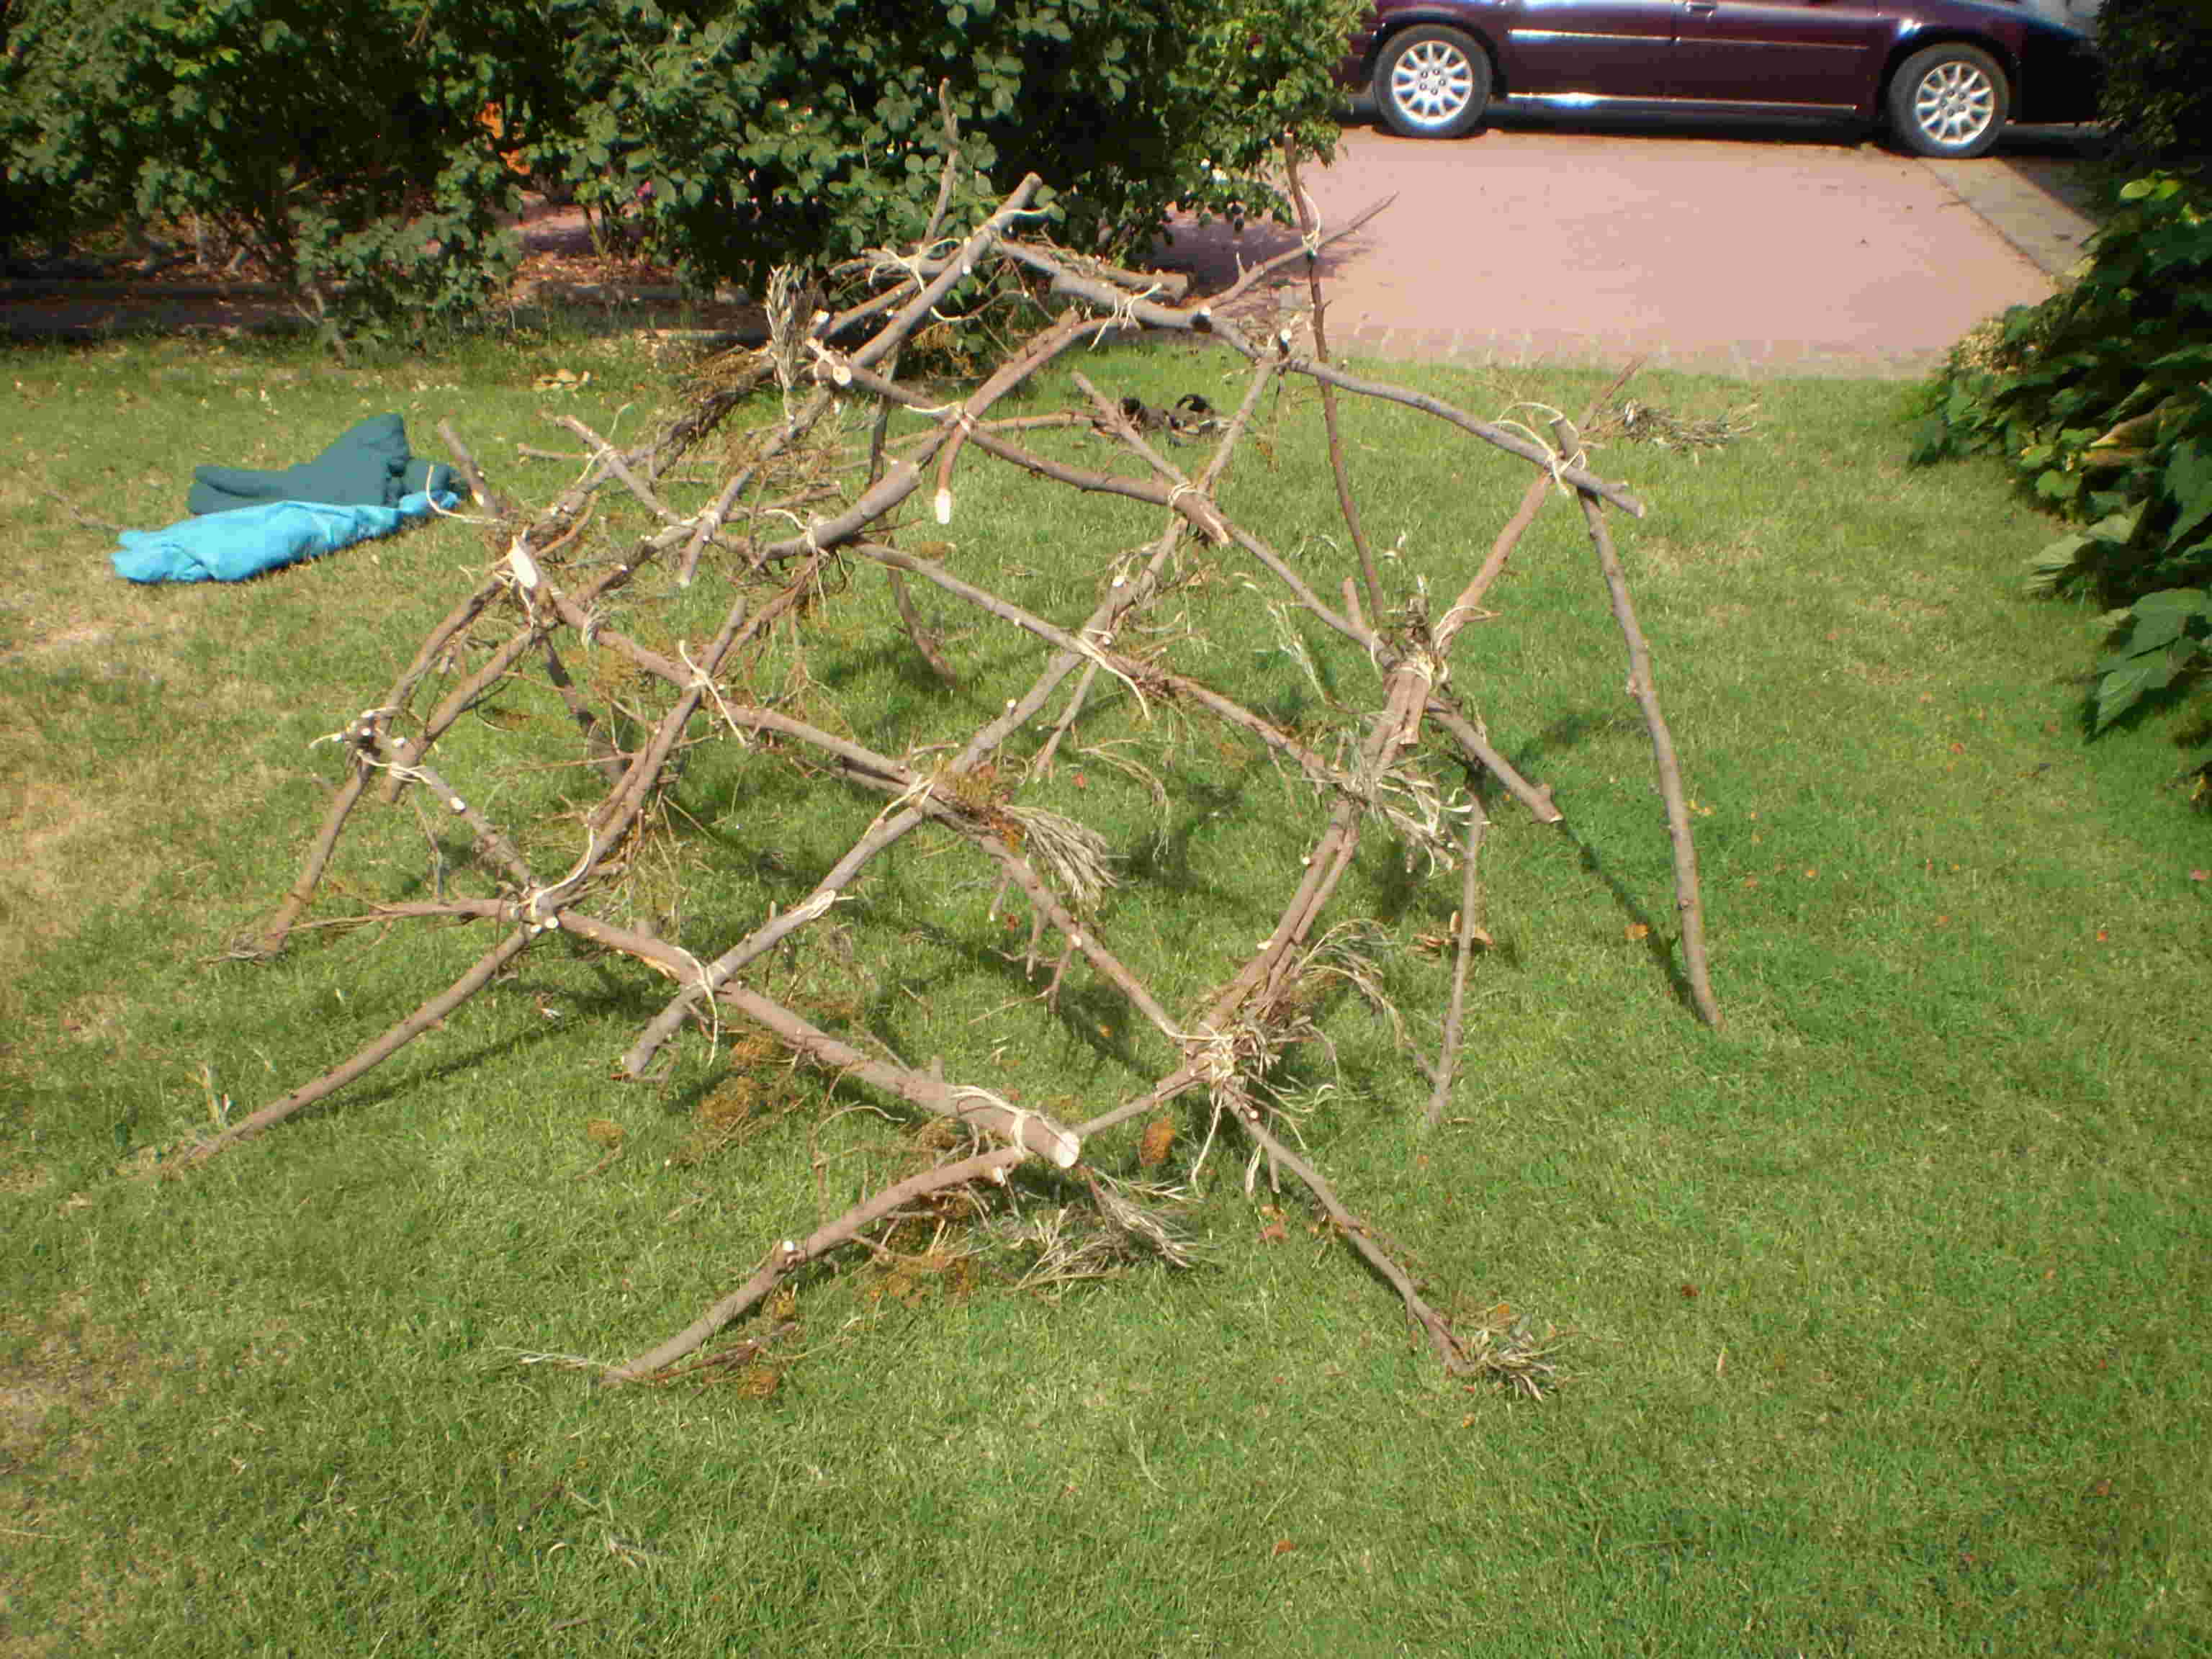
By orienting the twigs so they bow upwards instead of lying flat, and then tying them into place, a convex structure begins to emerge.
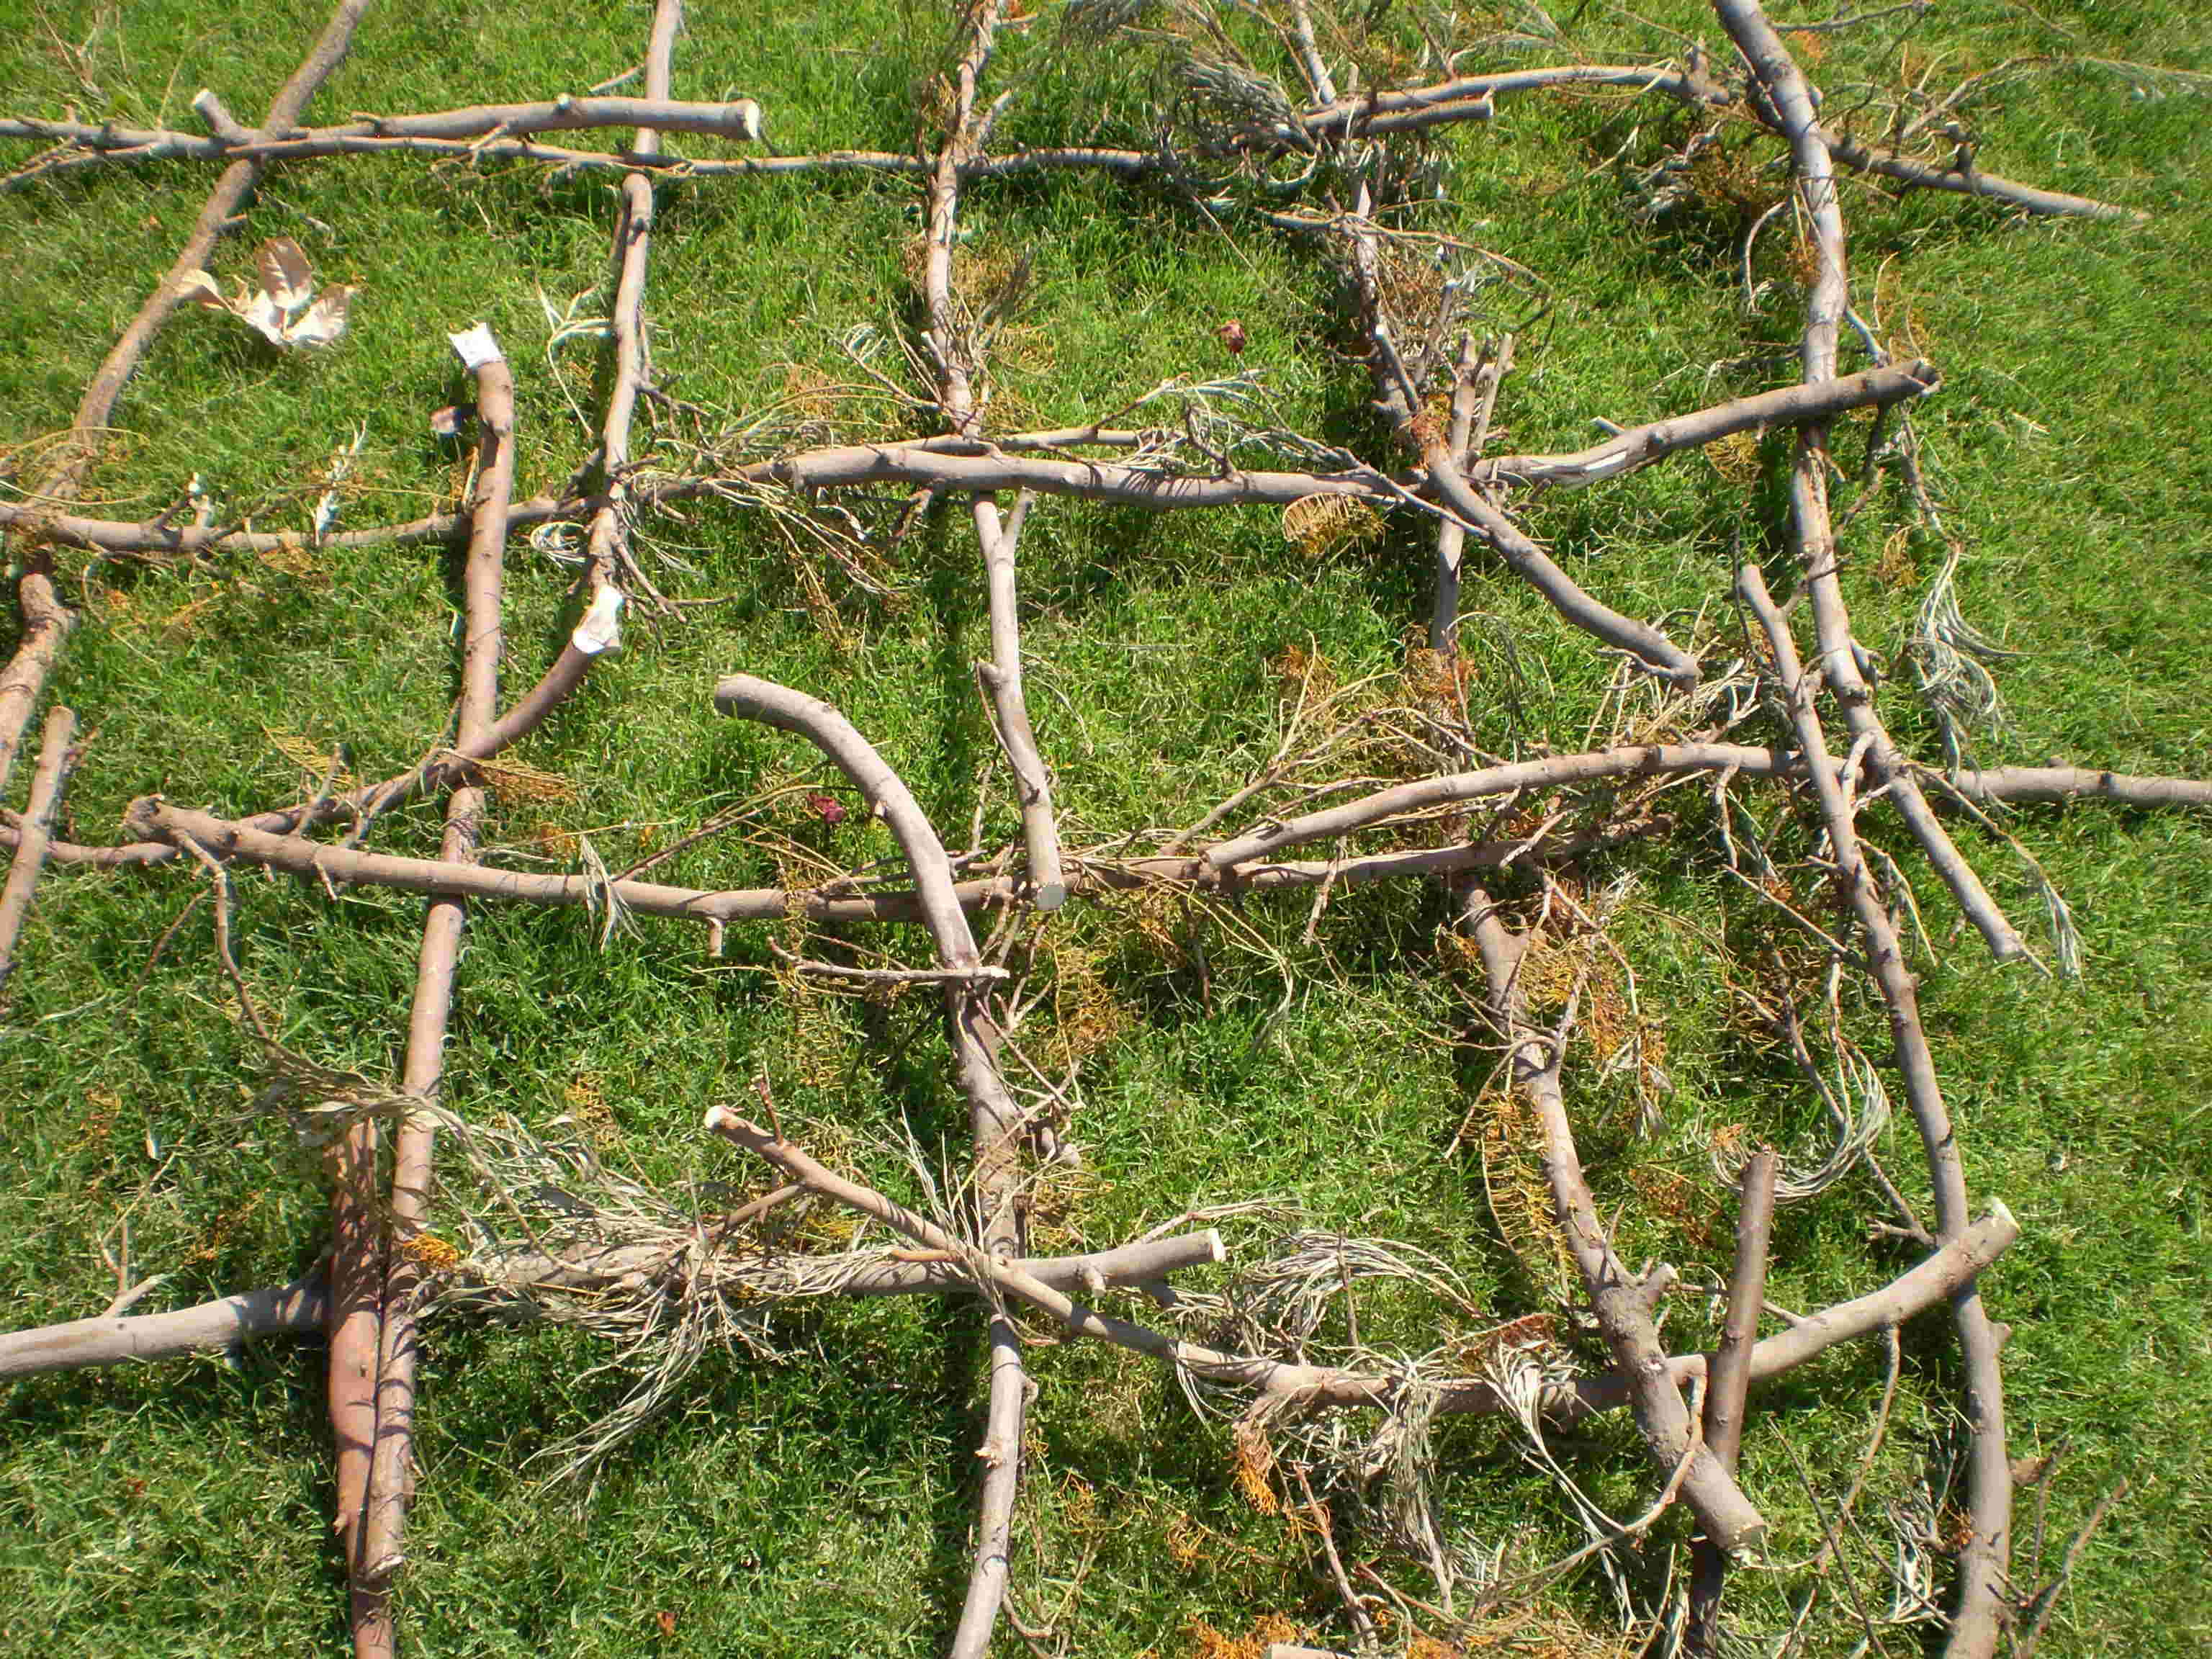
Supporting some of the edges on additional twigs allows access. Coverings of any kind begin to provide protection from the elements
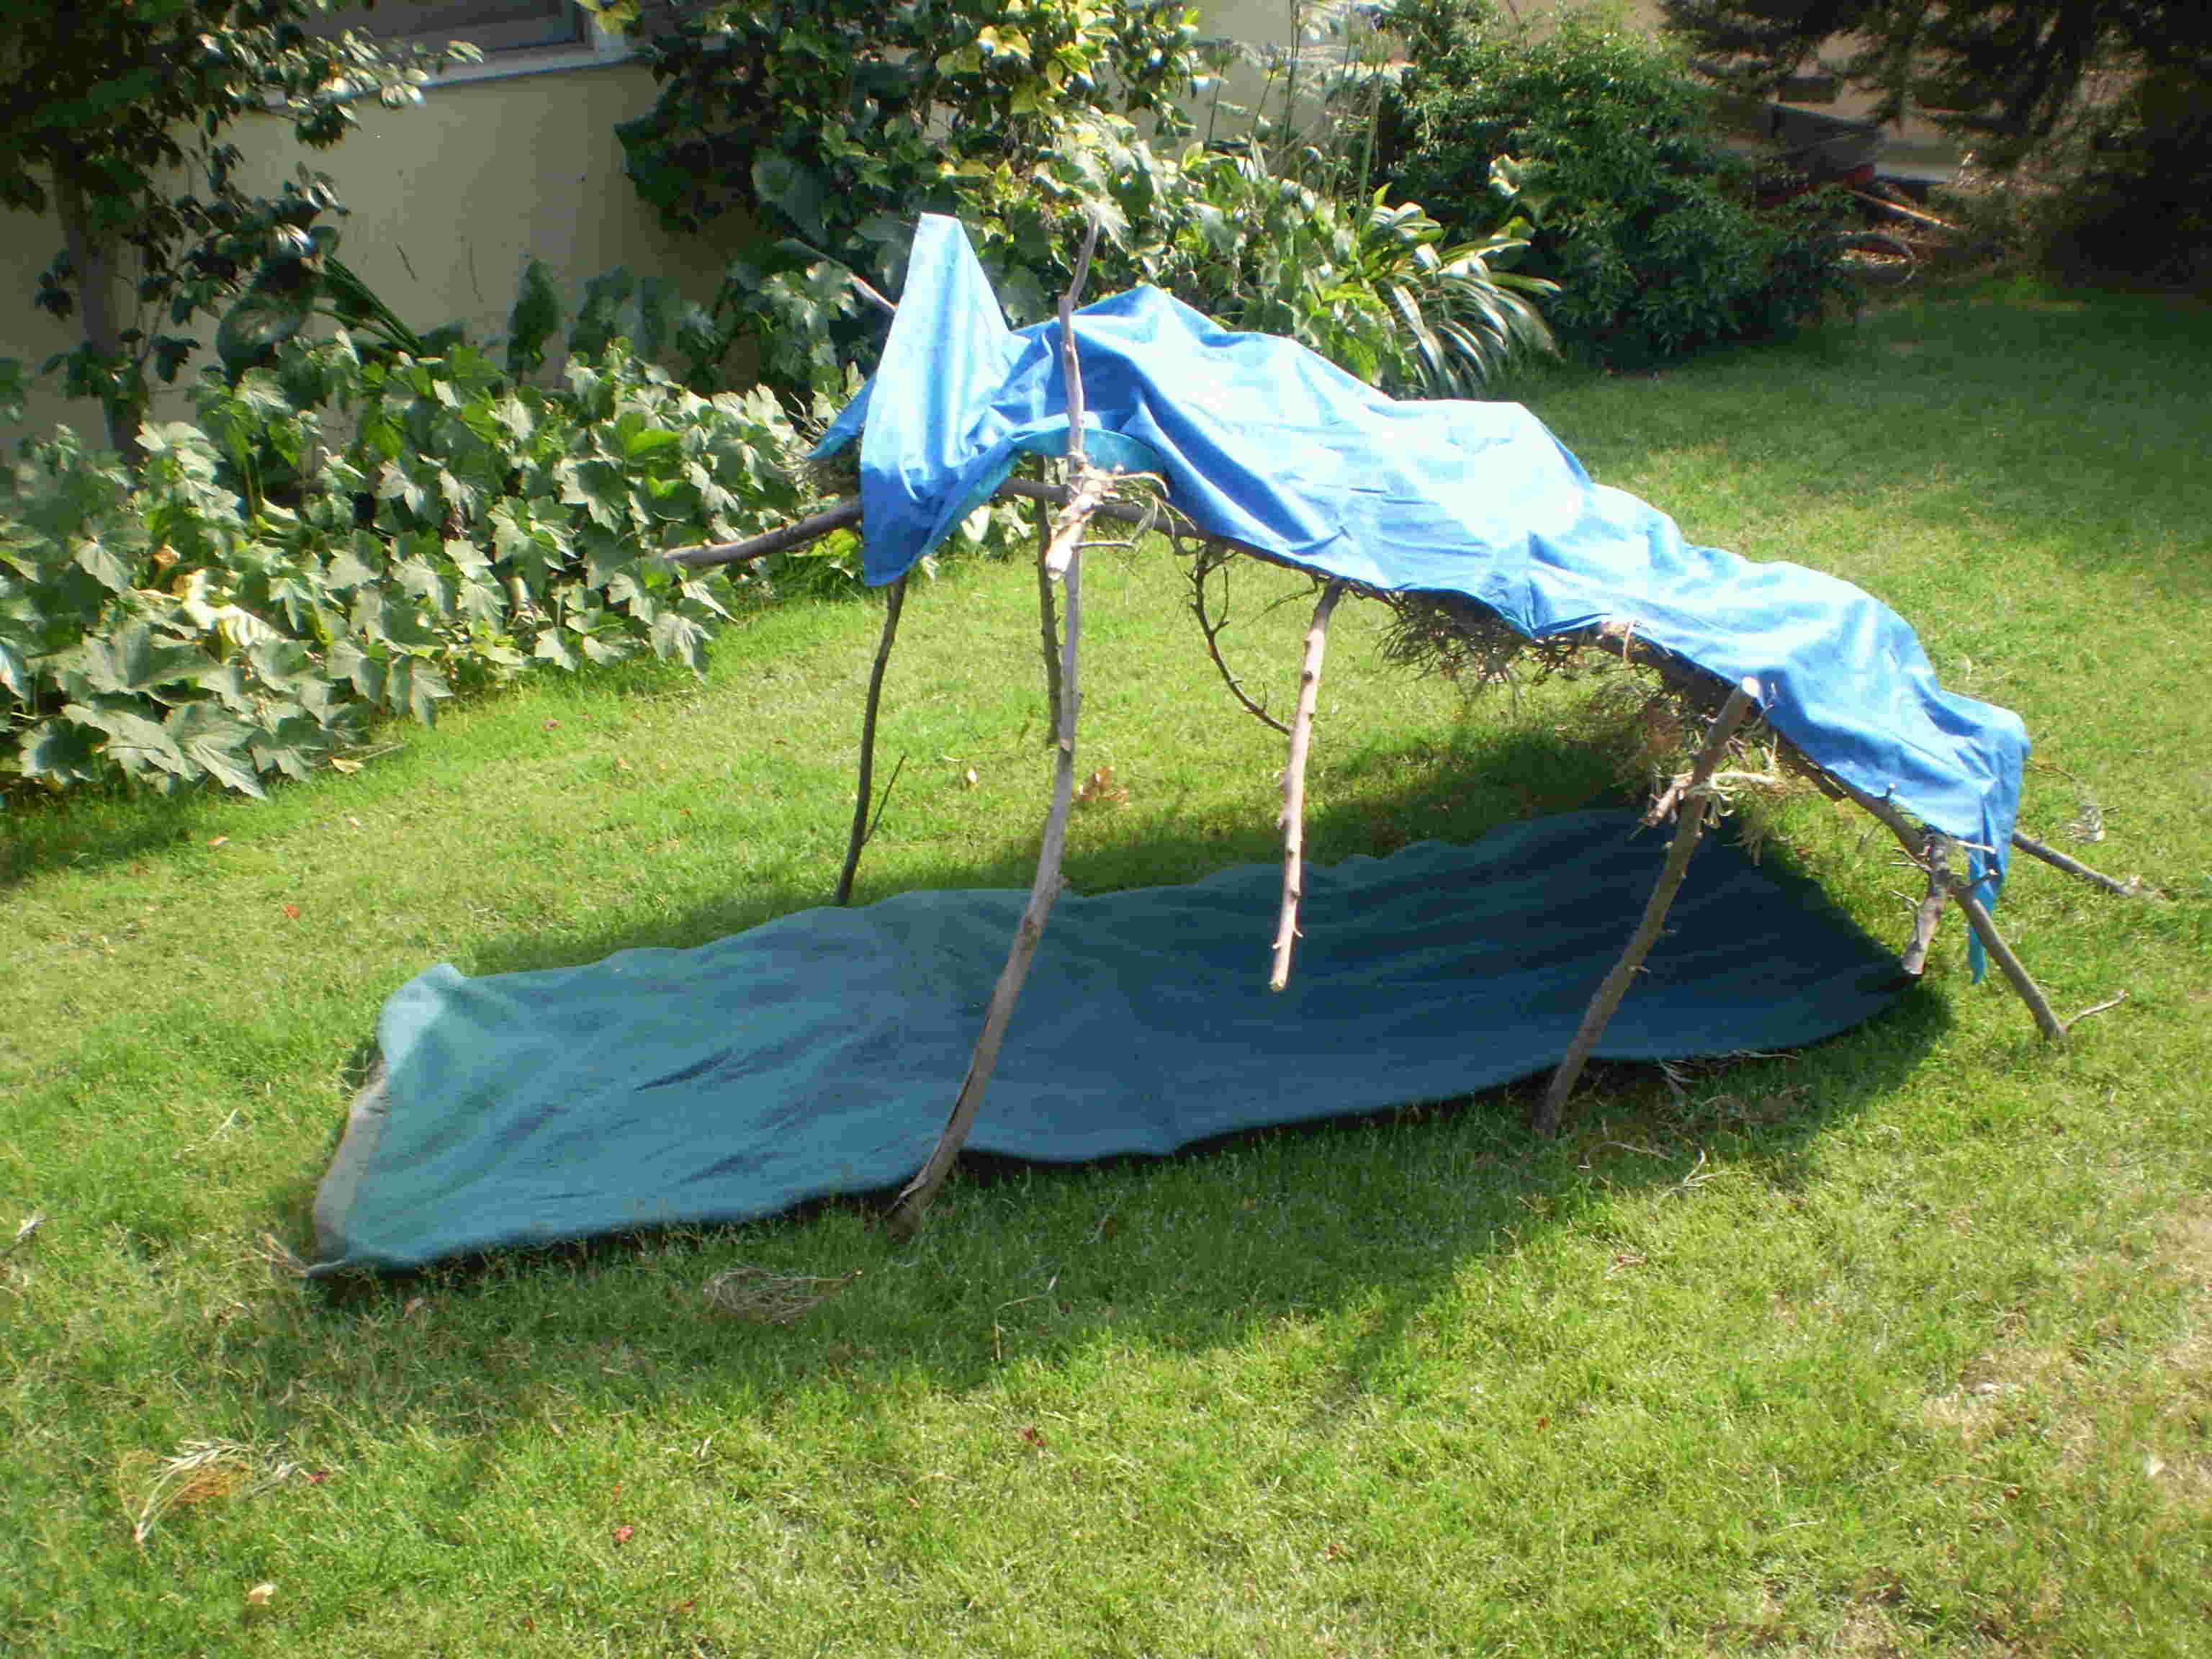
If you can build any kind of structure from the materials used here, you can produce a shelter from almost anything almost everywhere. As far as I know, there would be no theoretical limit to the size that could be built.
For those with a little more resource, consider building a homeless “city hall” using the technique to follow:
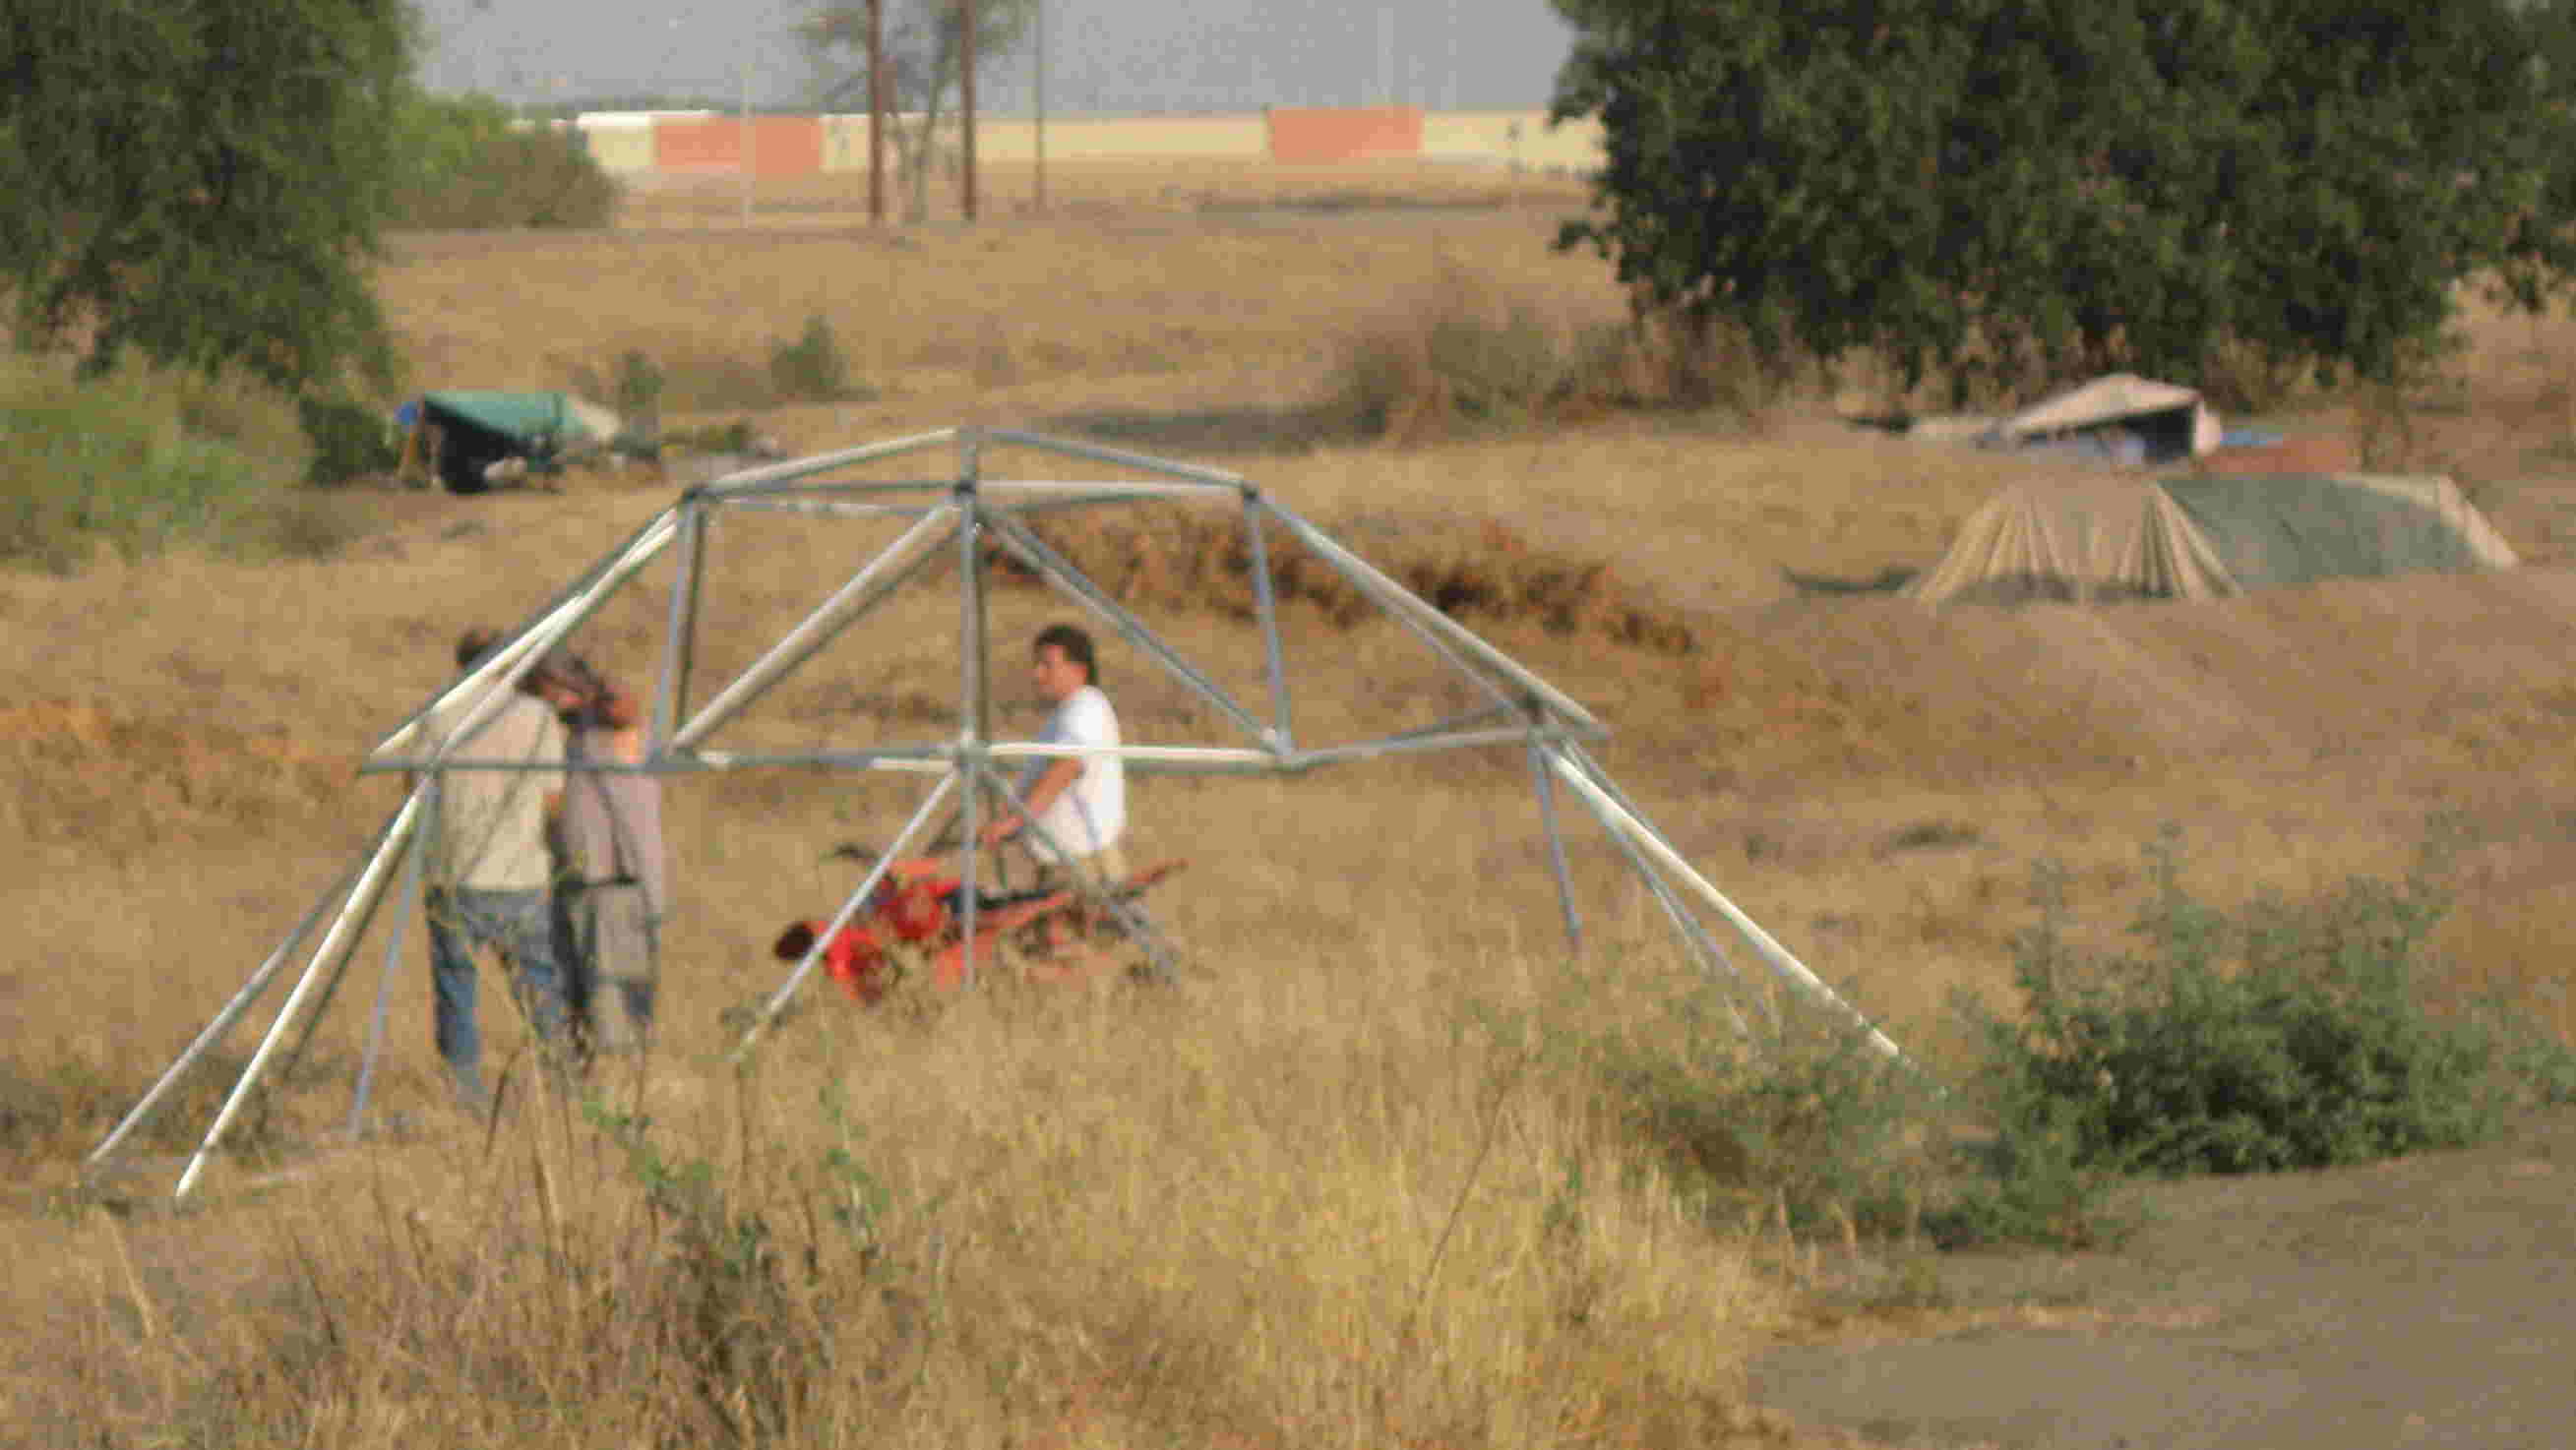
Parabolic Dome
A common shelter for meeting and preparing meals would be a top priority in an emergency situation, and a bolt-together frame that could be covered with any available material would be a good candidate. A set of struts prepared before-hand would take up little storage, and could be shipped to places in need.
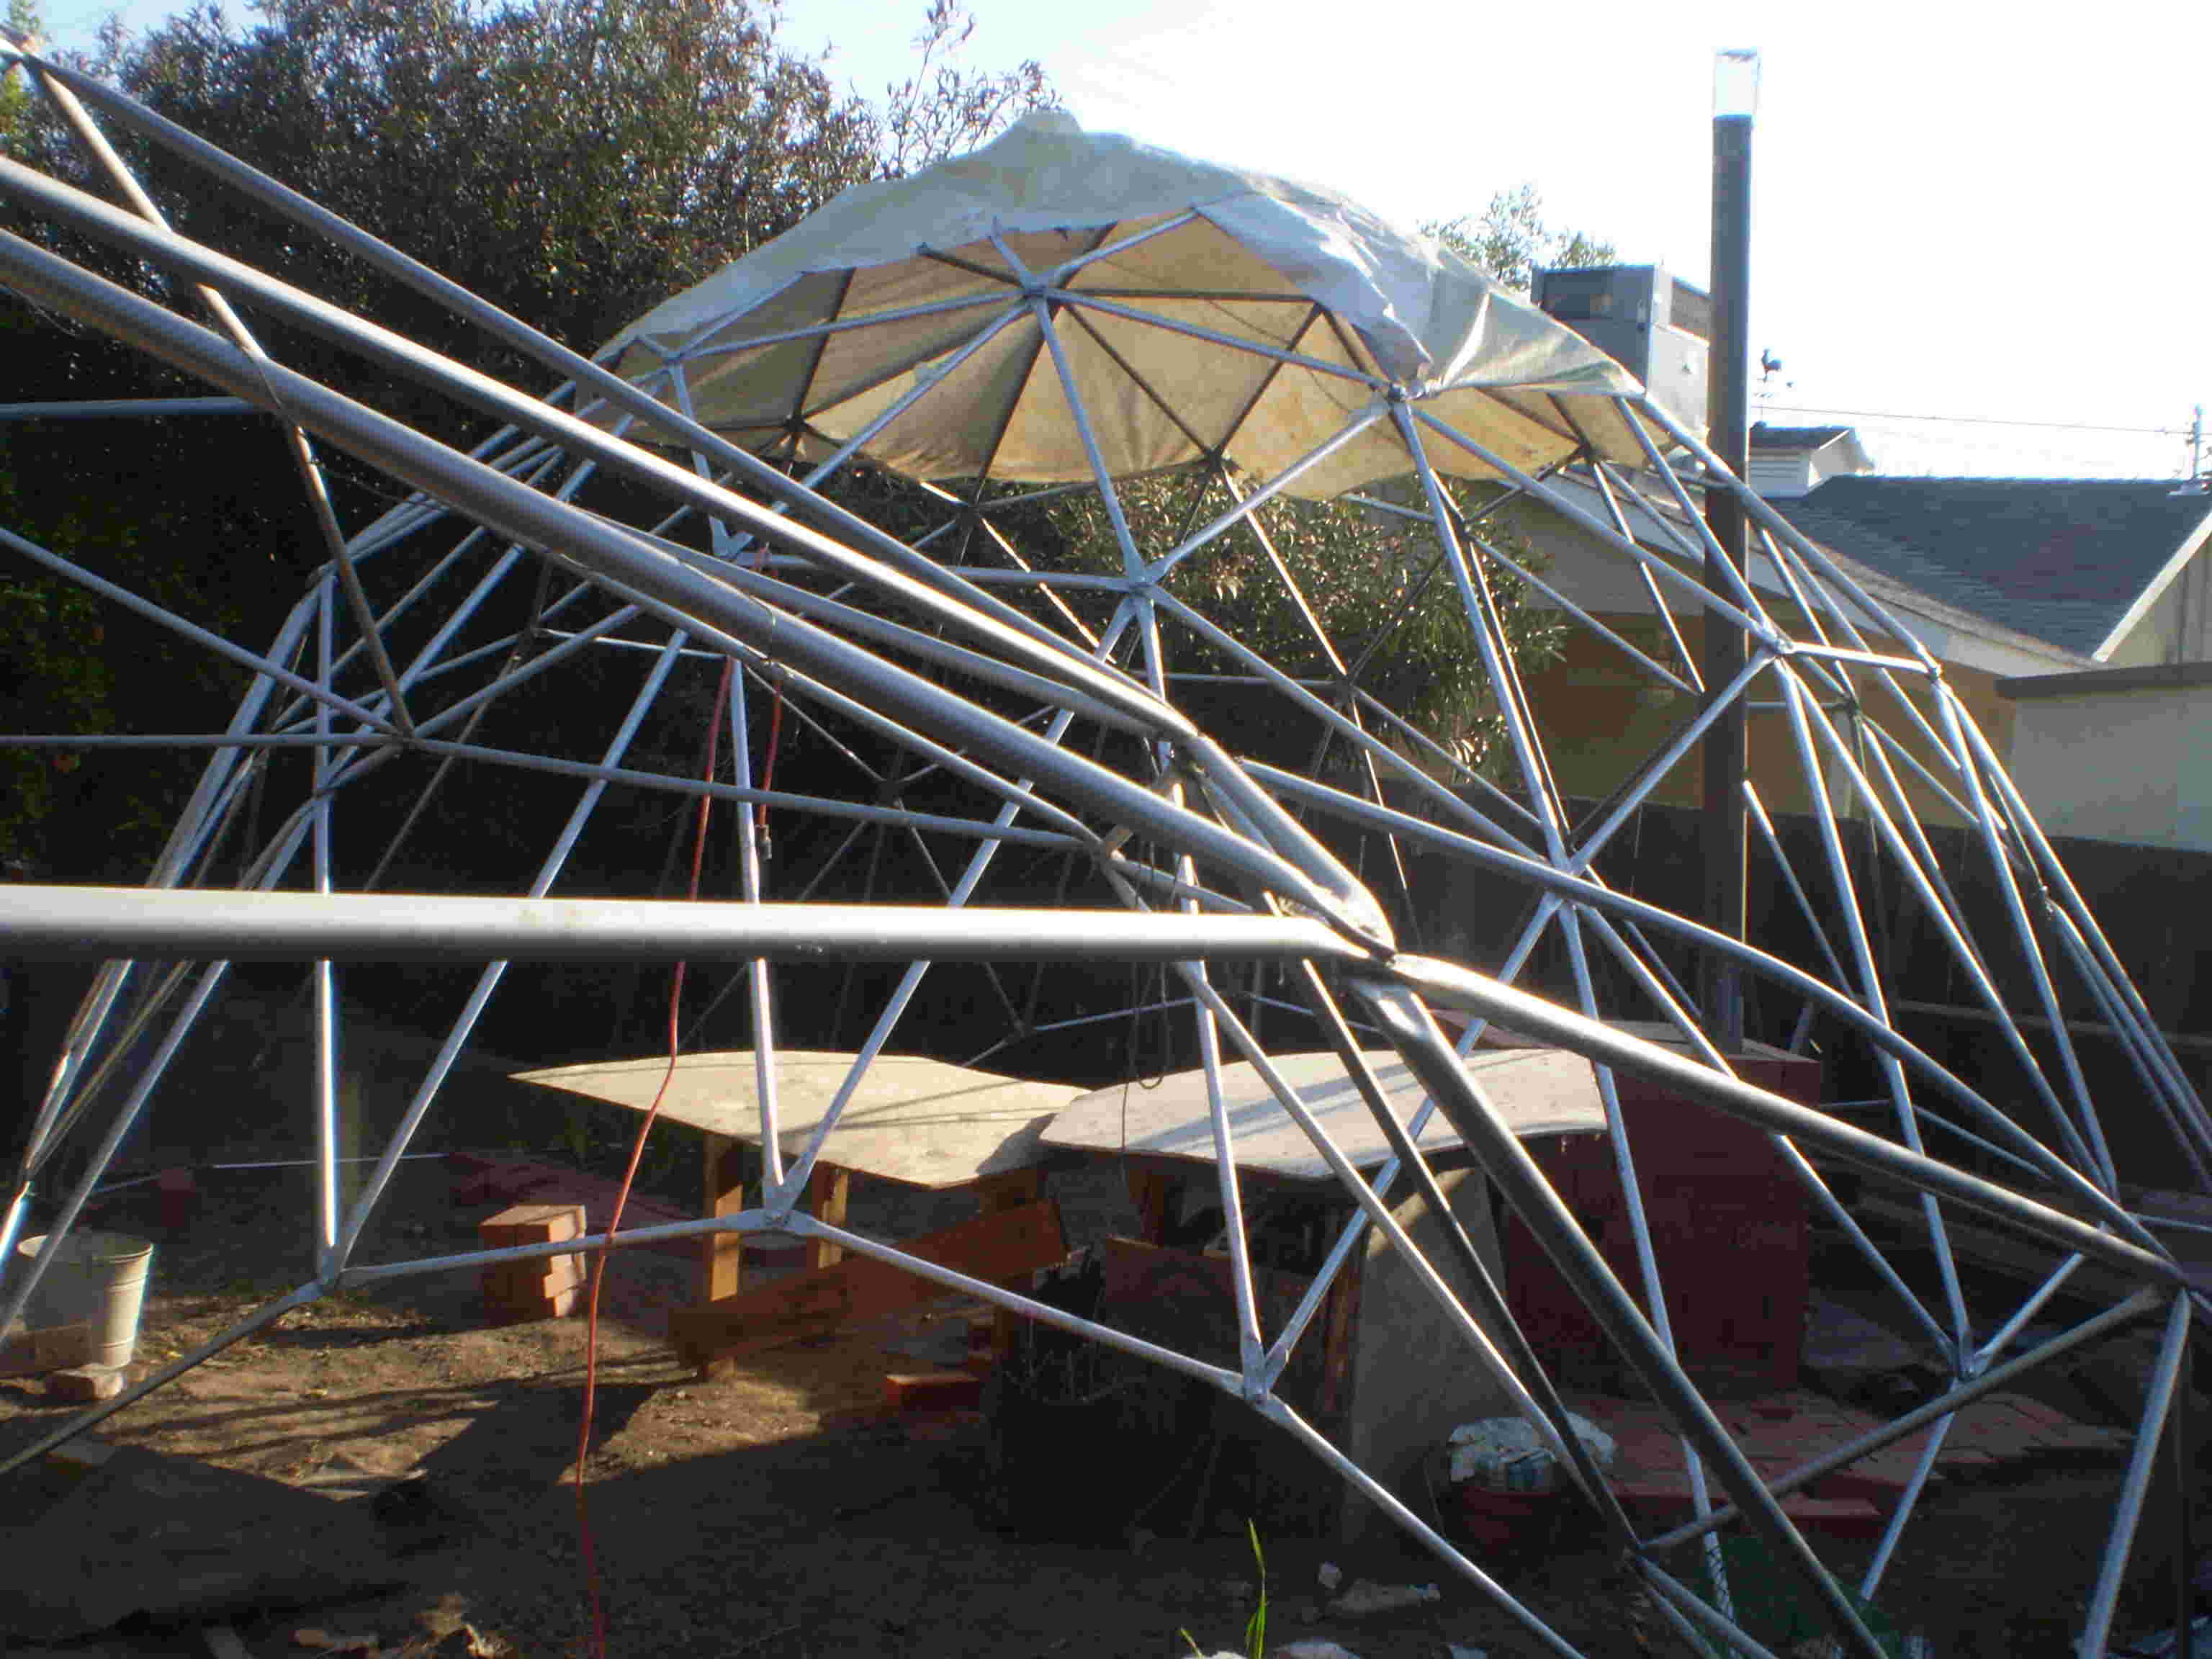
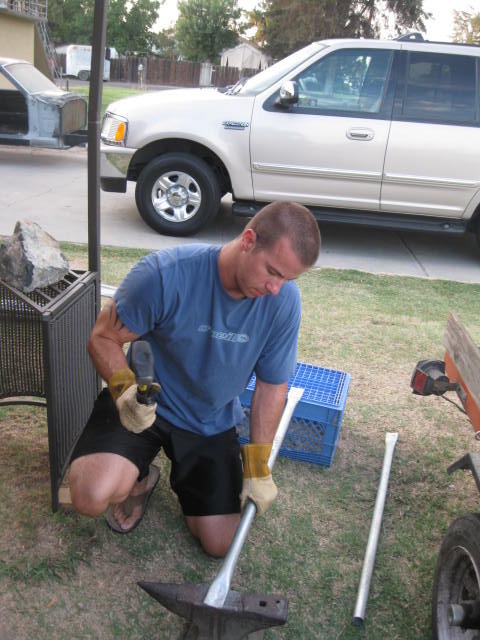
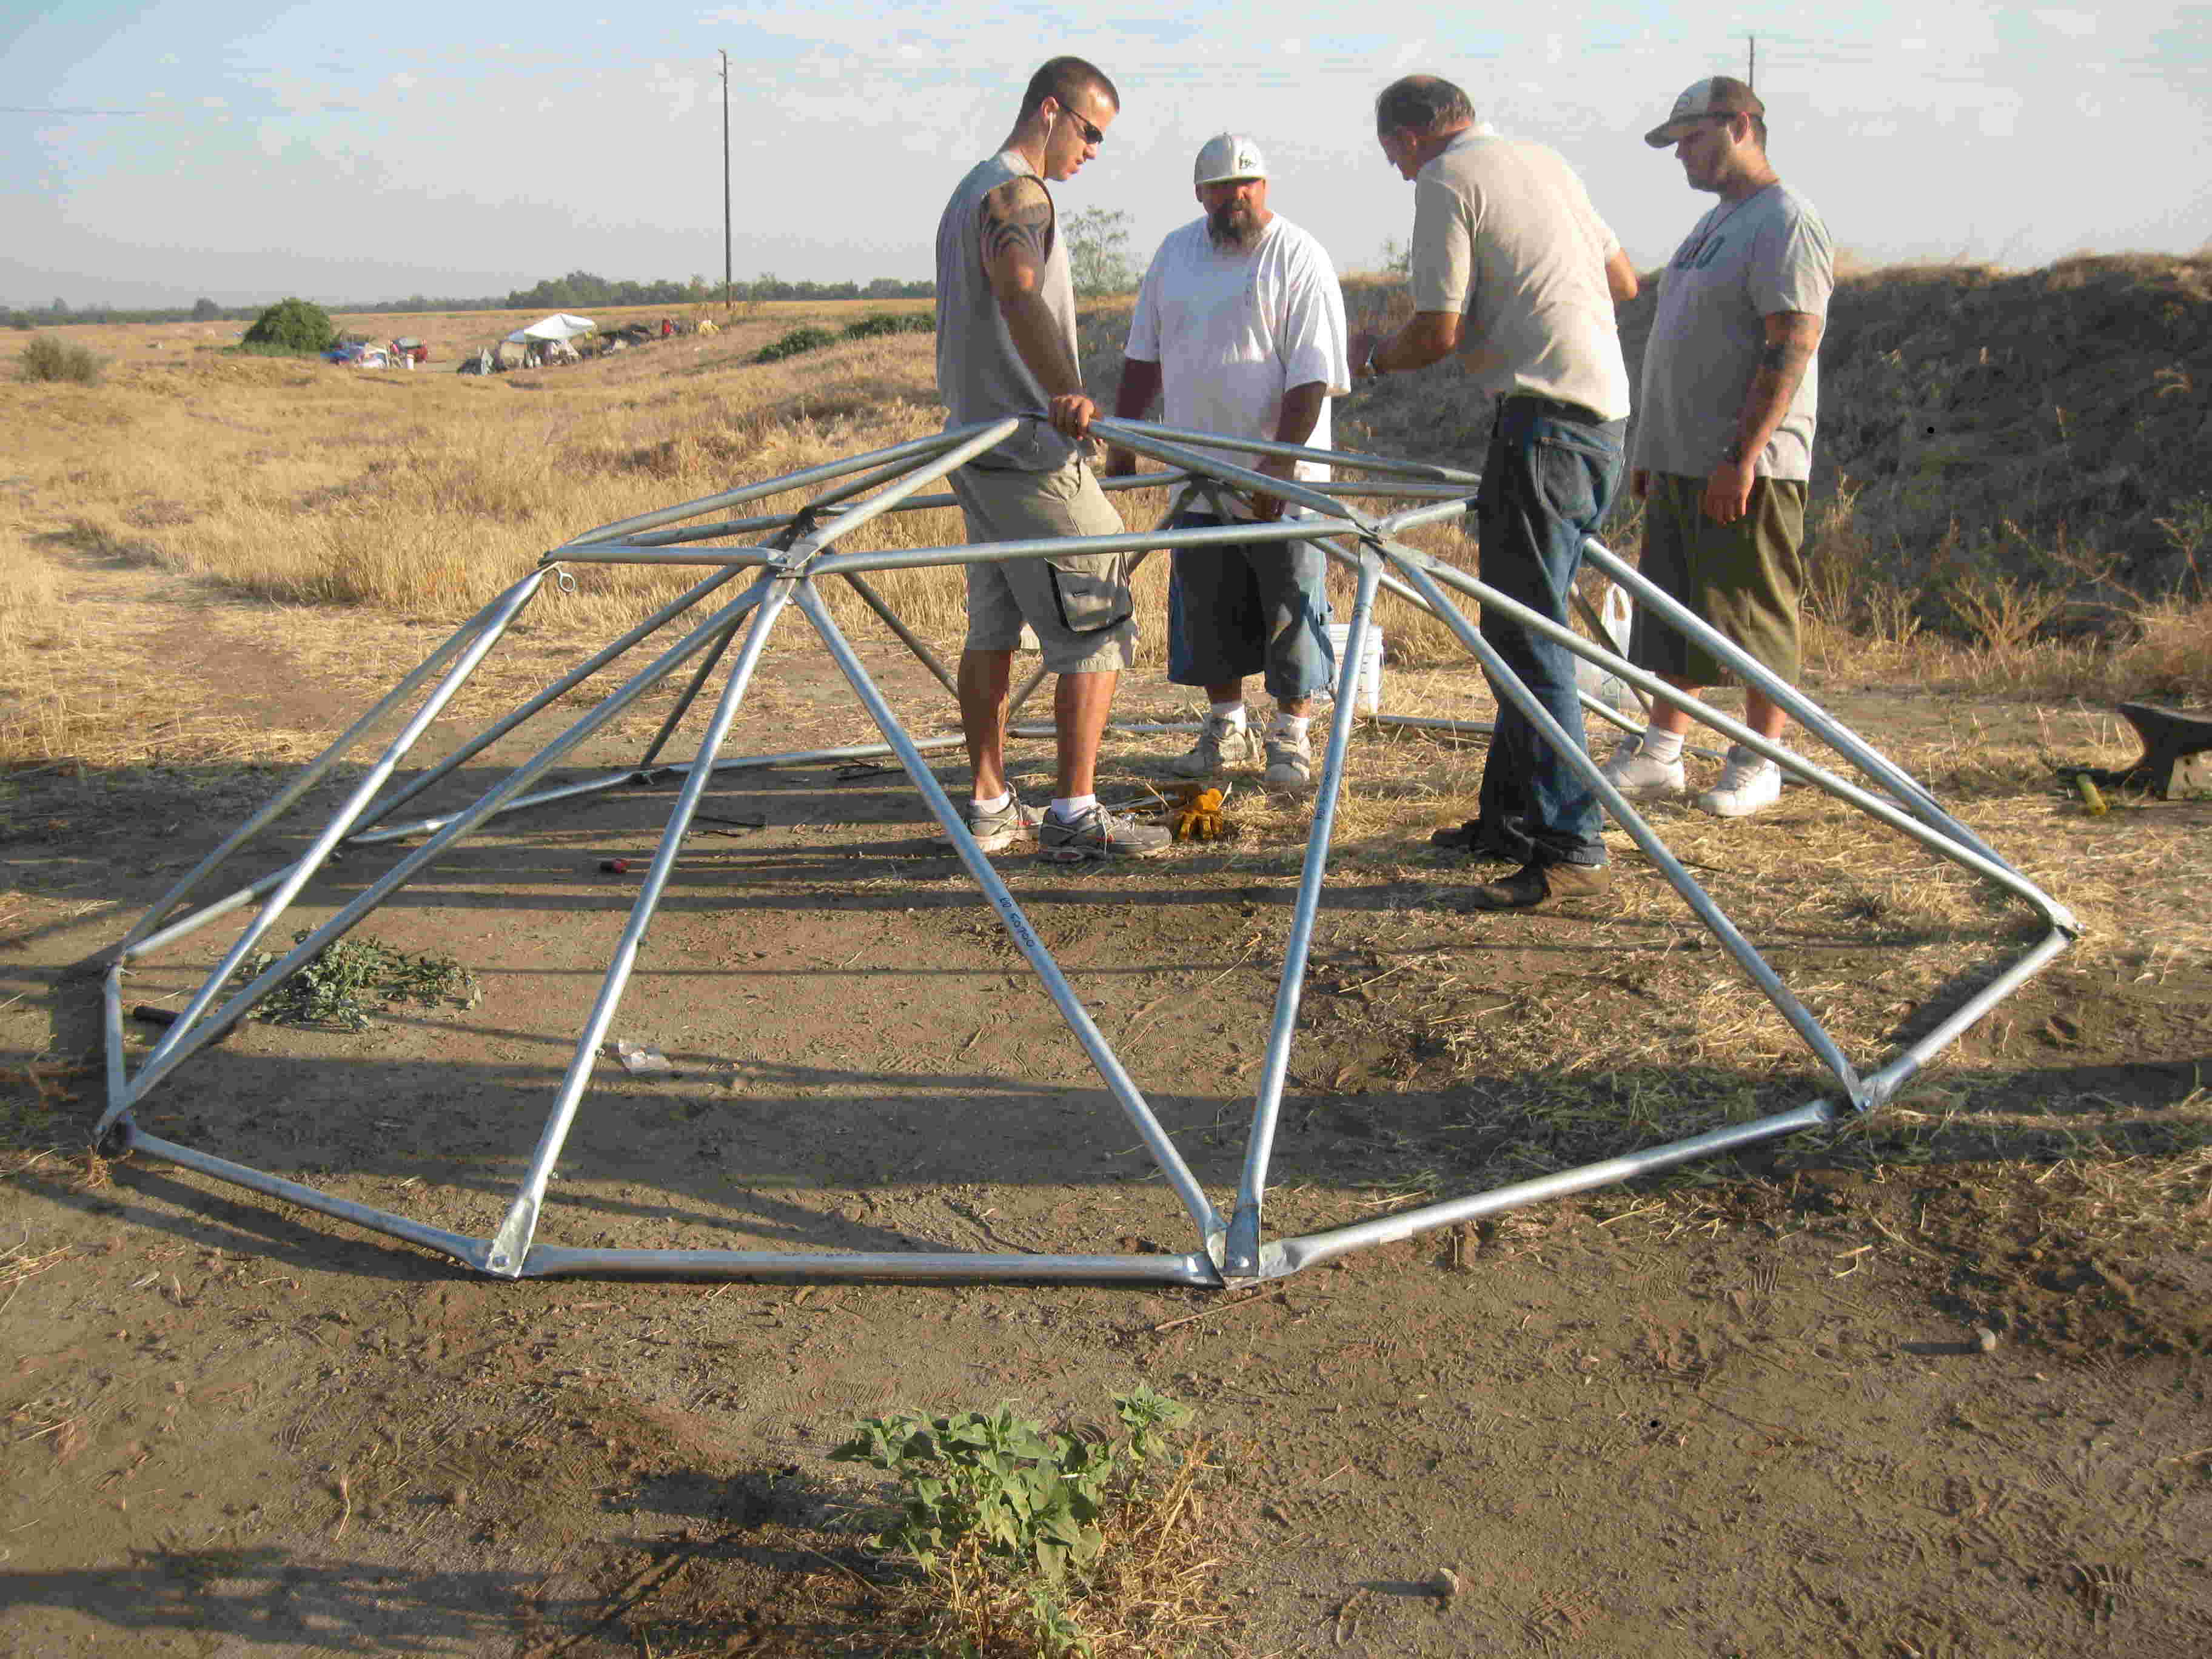
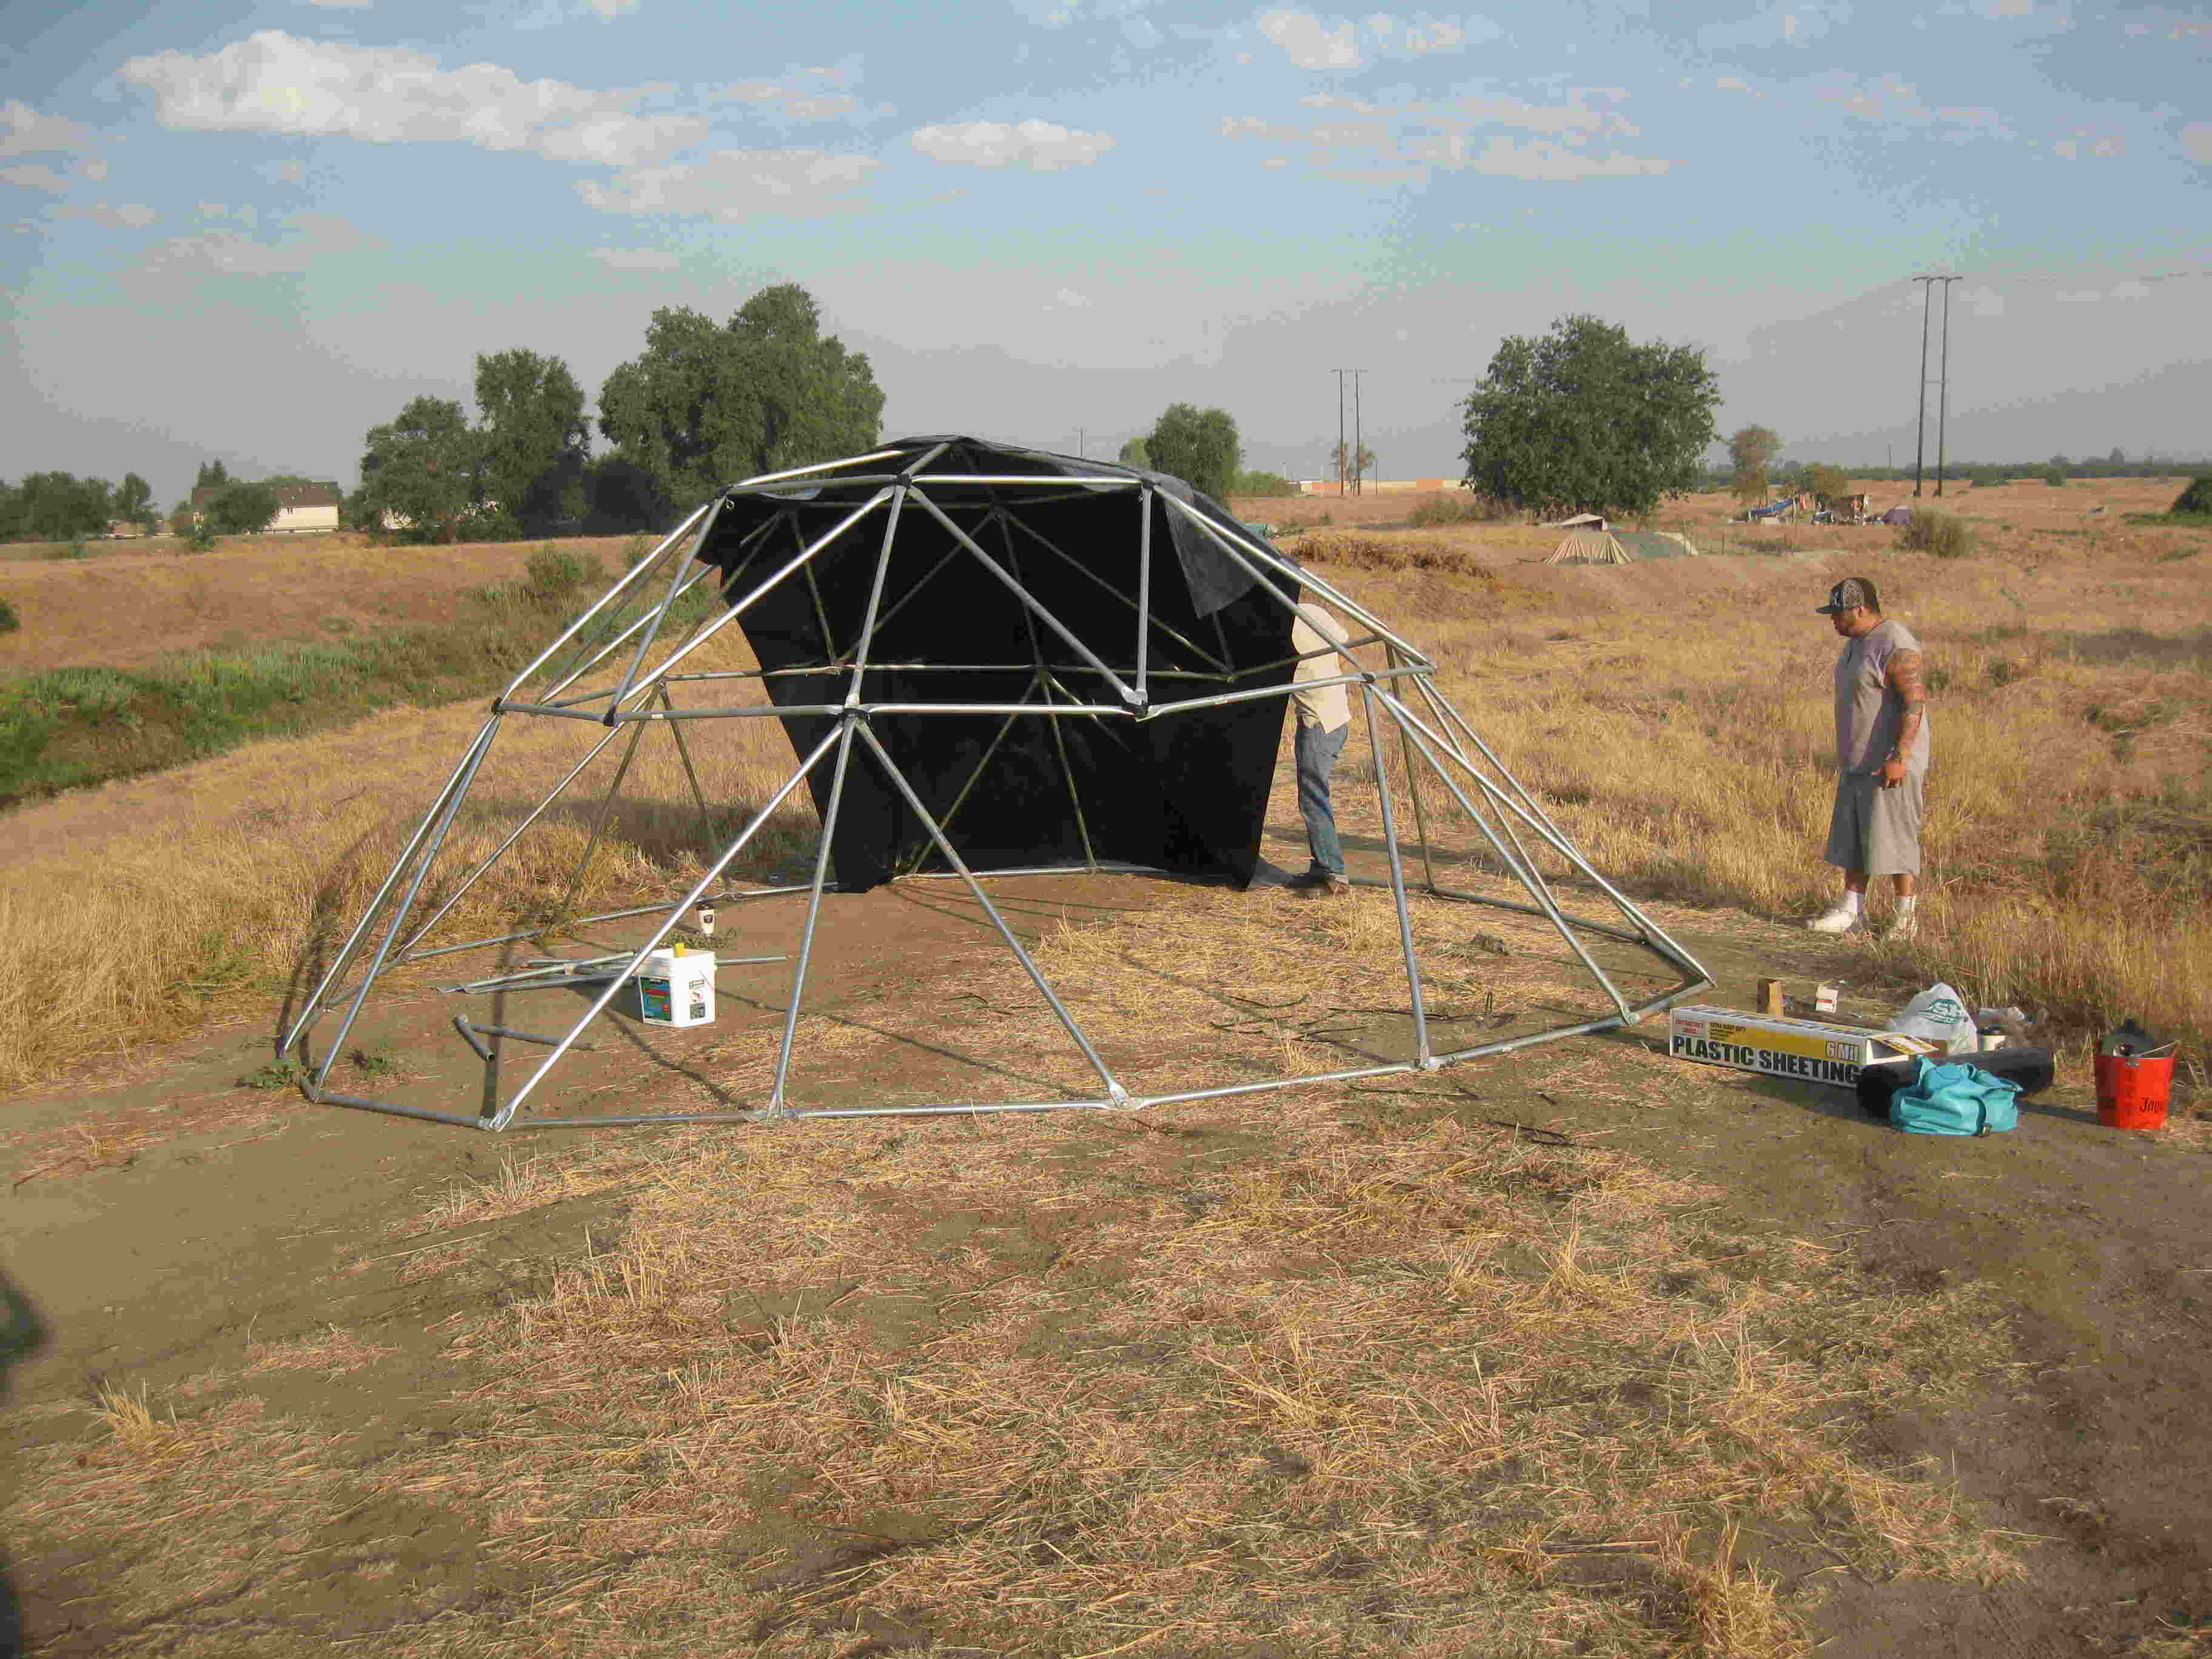
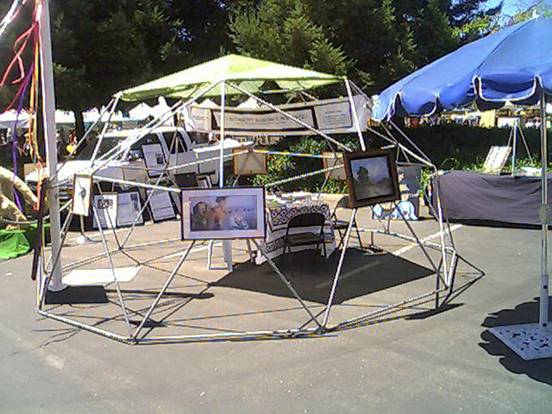
The photo shows a twenty foot diameter parabolic dome that is ten feet tall. Construction is simple: 3/4” metal conduit is cut to lengths, the ends are flattened and drilled, and then bolted together.
 At
a little over 300 square feet, this could provide emergency shelter
for about 15 people (at 20 sq.ft. per person), but as long as we're
going to the trouble, a 28 foot dome would provide enough for about
30. In addition, since it would be 14feet tall, there would be a
useful overhead space.
At
a little over 300 square feet, this could provide emergency shelter
for about 15 people (at 20 sq.ft. per person), but as long as we're
going to the trouble, a 28 foot dome would provide enough for about
30. In addition, since it would be 14feet tall, there would be a
useful overhead space.
For a structure this size you would need thicker tubing. I would probably go with top rail such as is used along the tops of chain link fences.
With a wood-fired cook stove, this structure could provide community meals as well as emergency sleeping space It would remain as a community center long after residents had developed their private dwellings.
If we define both the height and radius as equal to one, we have a surprisingly easy way to calculate lengths for any size dome. The “chord factor” of a strut is simply its length divided by the radius of the dome. For a dome with a 10' radius, such as the one pictured above, a chord factor of 0.284 would mean a strut 2.84 feet long (0.284 times 10 feet). So if you wanted a dome 5' tall (10' diameter), the strut would be 1.42 feet long (0.284 times 5).
We can also apply this measurement principle to calculating the height of each of the vertices's where the struts meet. The point at the top for instance would have a “chord” factor of exactly 1.
The dome is simpler than it looks. It is based upon a hexagonal pattern, so once you get one sixth of it down, the rest is repetition.
This illustration shows one sixth of a dome. It is different from the one in the photo, because each row (E-F-F-E for instance) of vertices's defines part of a circle, rather than the sides of a hexagon as the one above. This is a more stable design in that it makes solid, level contact with the ground.
 The
vertices's where the strut ends meet are named by letters. The
individual struts are identified by the pair of vertices's they
connect. For the actual data, we can begin by giving the height
relative to the radius for each of the points on the dome.
The
vertices's where the strut ends meet are named by letters. The
individual struts are identified by the pair of vertices's they
connect. For the actual data, we can begin by giving the height
relative to the radius for each of the points on the dome.
|
point |
height |
ht. for 14' |
|
A |
1.0000 |
14.00 |
|
B |
0.9375 |
13.125 |
|
C |
0.7500 |
10.5 |
|
D |
0.7500 |
10.5 |
|
E |
0.4375 |
6.125 |
|
F |
0.4375 |
6.125 |
|
G,H,I |
0.0000 |
0.00 |
Since values are given in fractions of a foot, use a tape measure that includes decimal fractions. Keep in mind that the distances given are to the centers of the holes drilled. For structures using top rail I would recommend adding about 1/10th of a foot to each length to protrude beyond the center of the bolt hole.
|
Strut Name |
Chord Factor |
Center-center for 14' radius |
Center-center plus 0.1 feet |
|
AB |
0.25769 |
3.6077 |
3.7077 |
|
BB |
0.25000 |
3.5000 |
3.6000 |
|
BC |
0.31250 |
4.3750 |
4.4750 |
|
BD |
0.36214 |
5.0700 |
5.1700 |
|
CE |
0.40020 |
5.6027 |
5.7027 |
|
CF |
0.45320 |
6.3447 |
6.4447 |
|
CD |
0.25882 |
3.6235 |
3.7235 |
|
DF |
0.41419 |
5.7986 |
5.8986 |
|
EF |
0.26047 |
3.6466 |
3.7466 |
|
EG |
0.50389 |
7.0545 |
7.1545 |
|
EH |
0.55228 |
7.7320 |
7.8320 |
|
FF |
0.26047 |
3.6466 |
3.7466 |
|
FH |
0.50952 |
7.1333 |
7.2333 |
|
FI |
0.52602 |
7.3642 |
7.4642 |
|
GH,HI |
0.26105 |
3.6547 |
3.7547 |
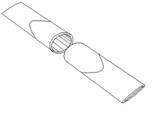
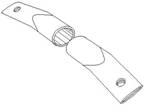
After the struts are cut to their proper lengths, the last 4 inches on each end is flattened; be careful that both ends are flattened in the same plane. The ends should also be slightly bent in the same direction, to accommodate the rounded shape of the structure. Each end is drilled with 3/8” holes, centered about 3/4” in from the ends.
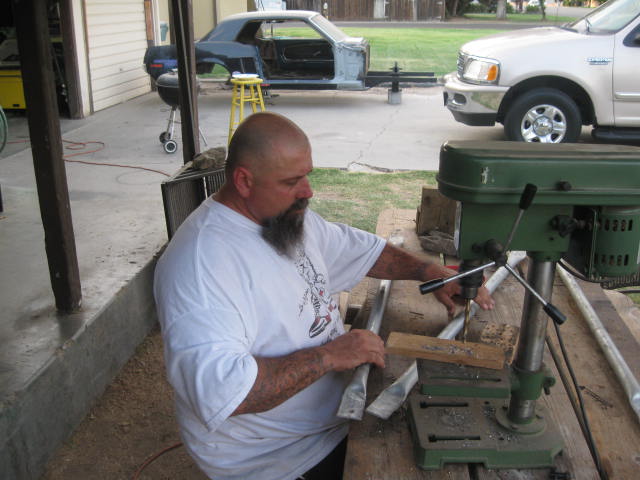
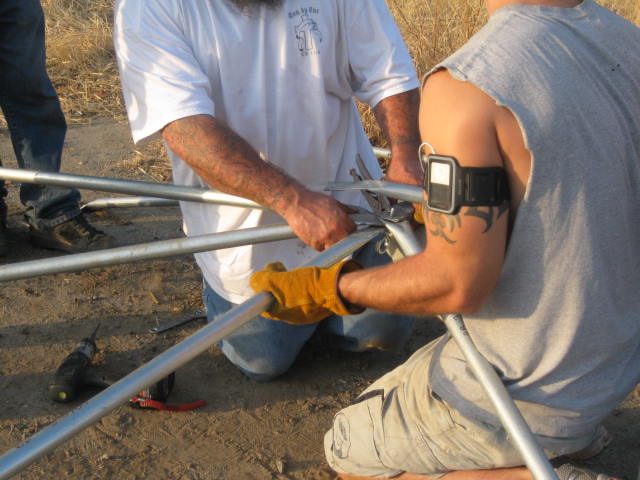
The pieces are then hauled to the construction site, laid out, and bolted together using 5/16” bolts.
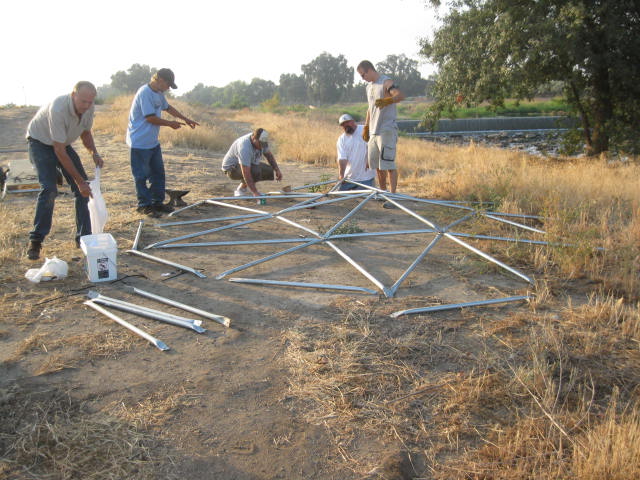
The top two rows of the 28' diameter dome have been completed in this 14' diameter segment shown. If you have any questions about the strength of this dome, now would be a good time to test it.
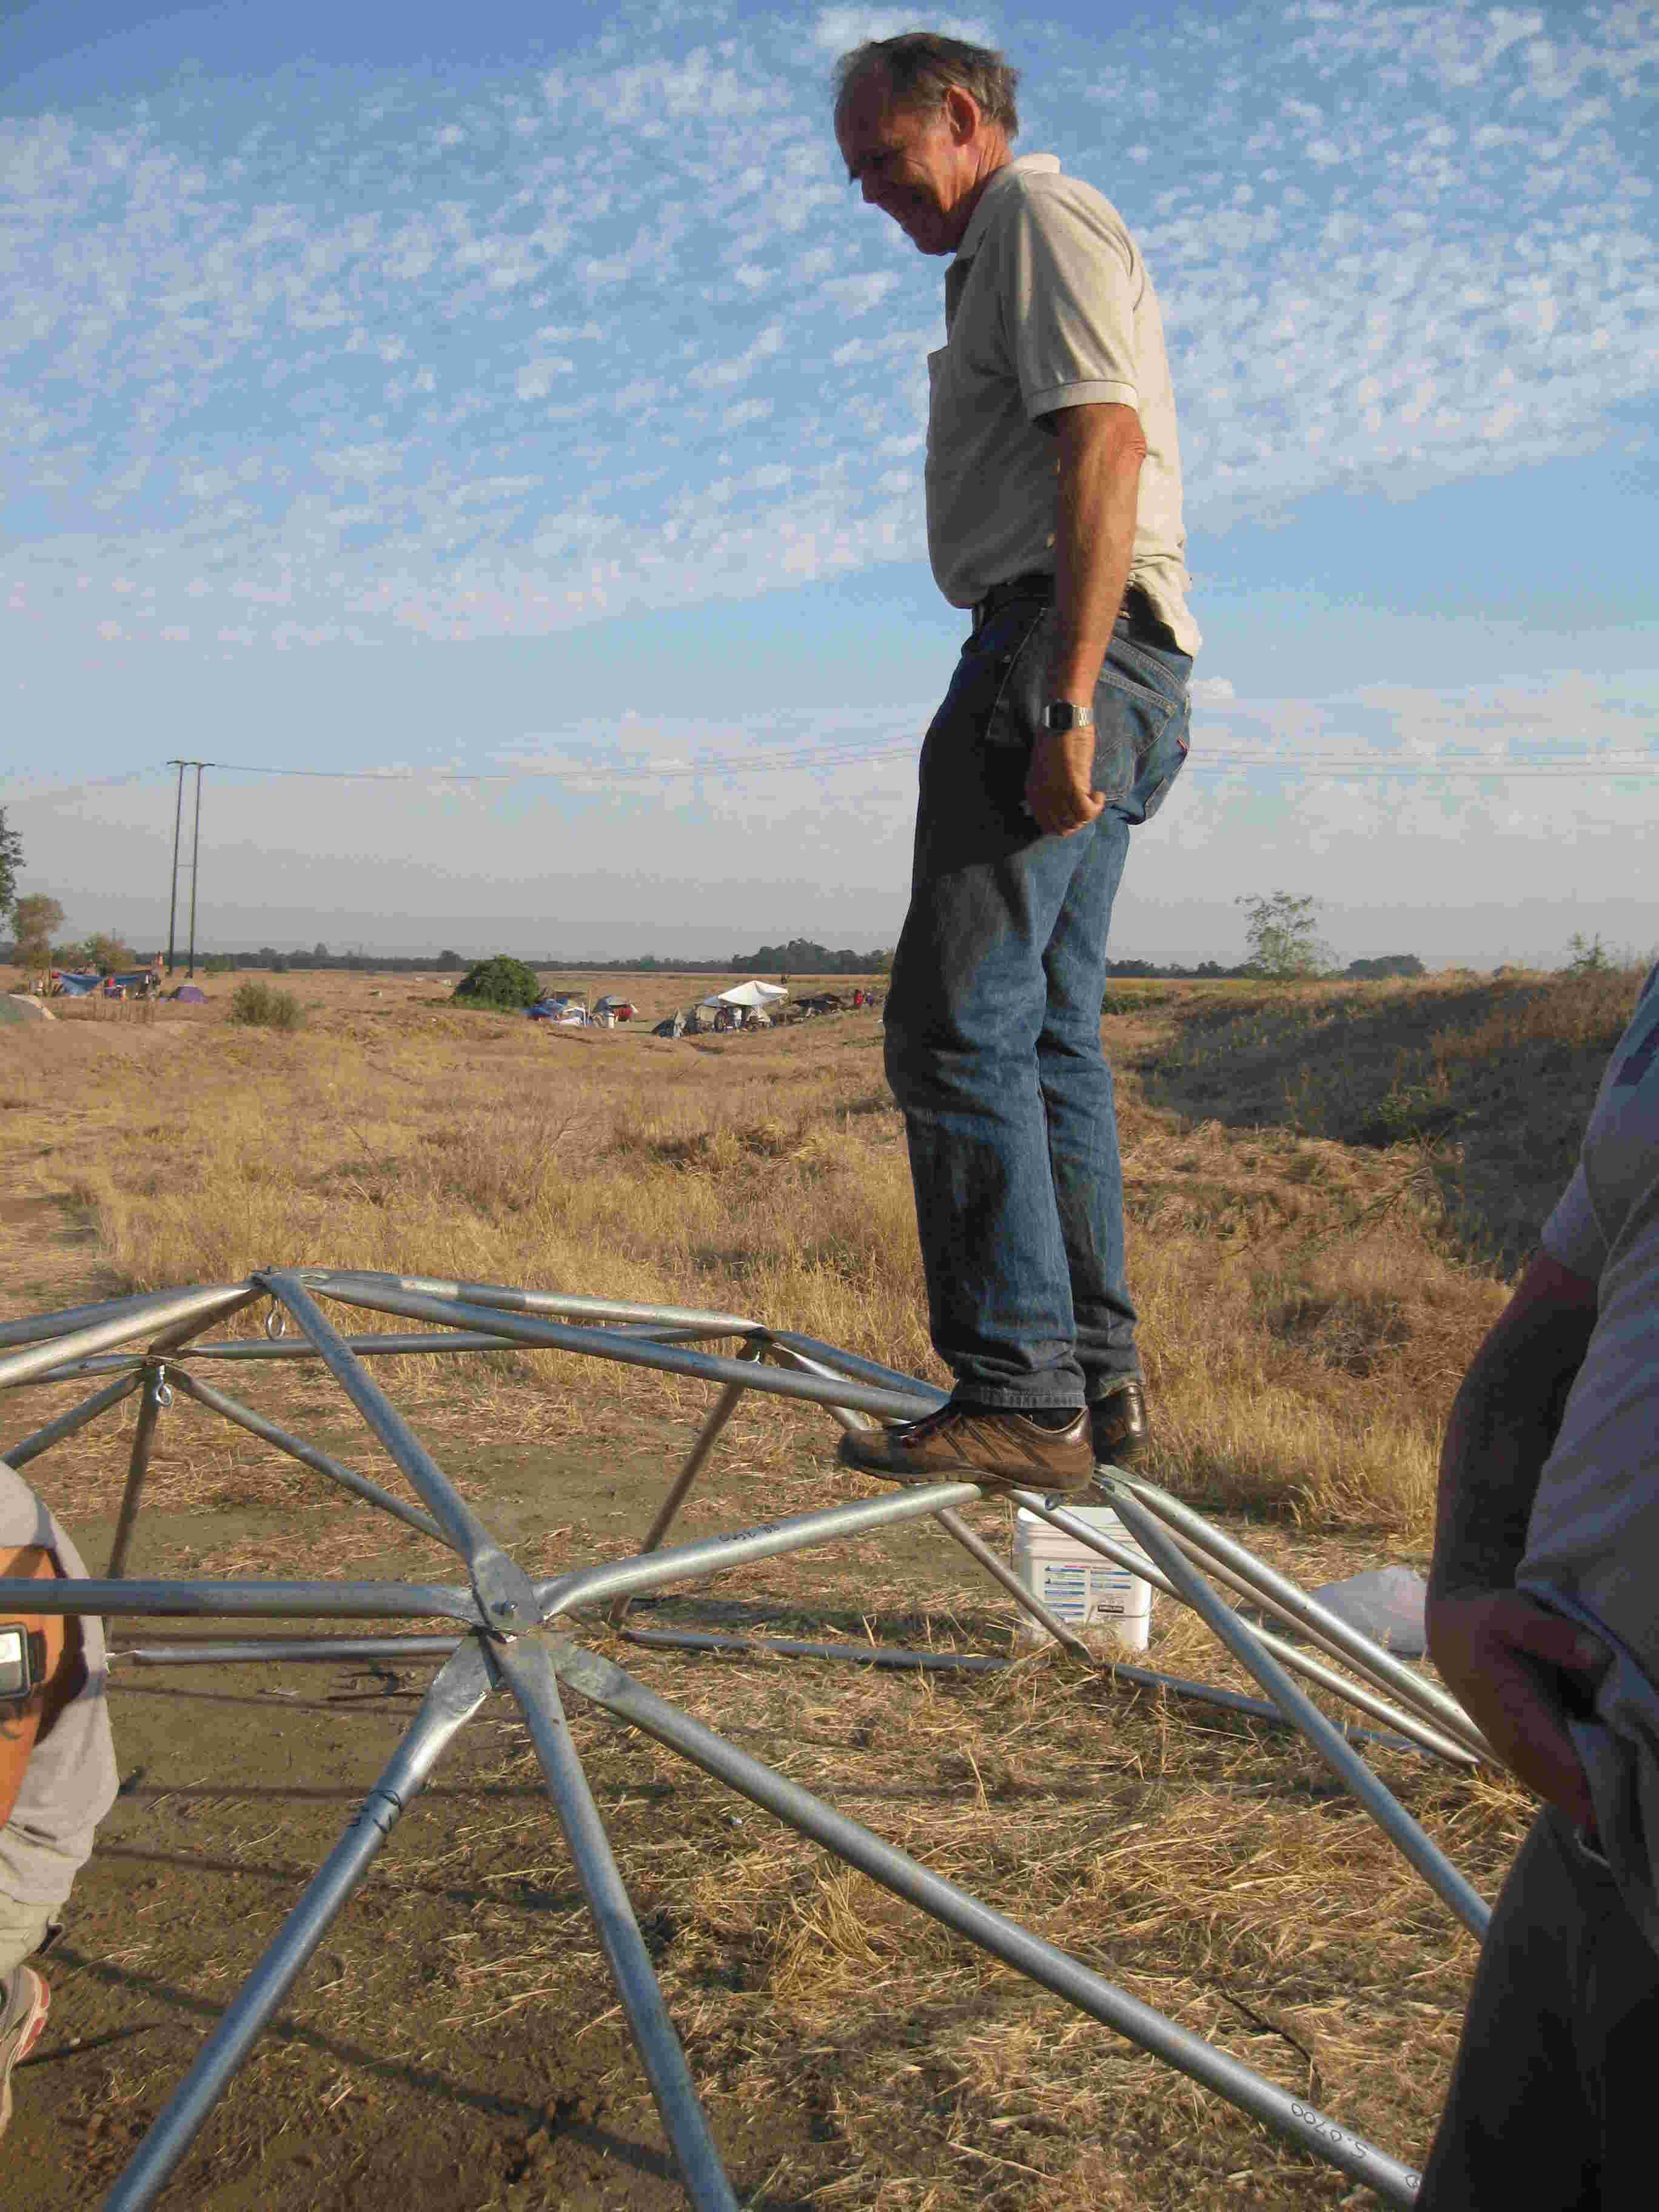
When another row of struts is added, the structure is about 8' tall, and covering can begin. Almost any form of tarp or membrane can be used for this, but almost any tarp or membrane will also deteriorate in the sunlight. I prefer to begin with heavy-duty (6-mil) black plastic).
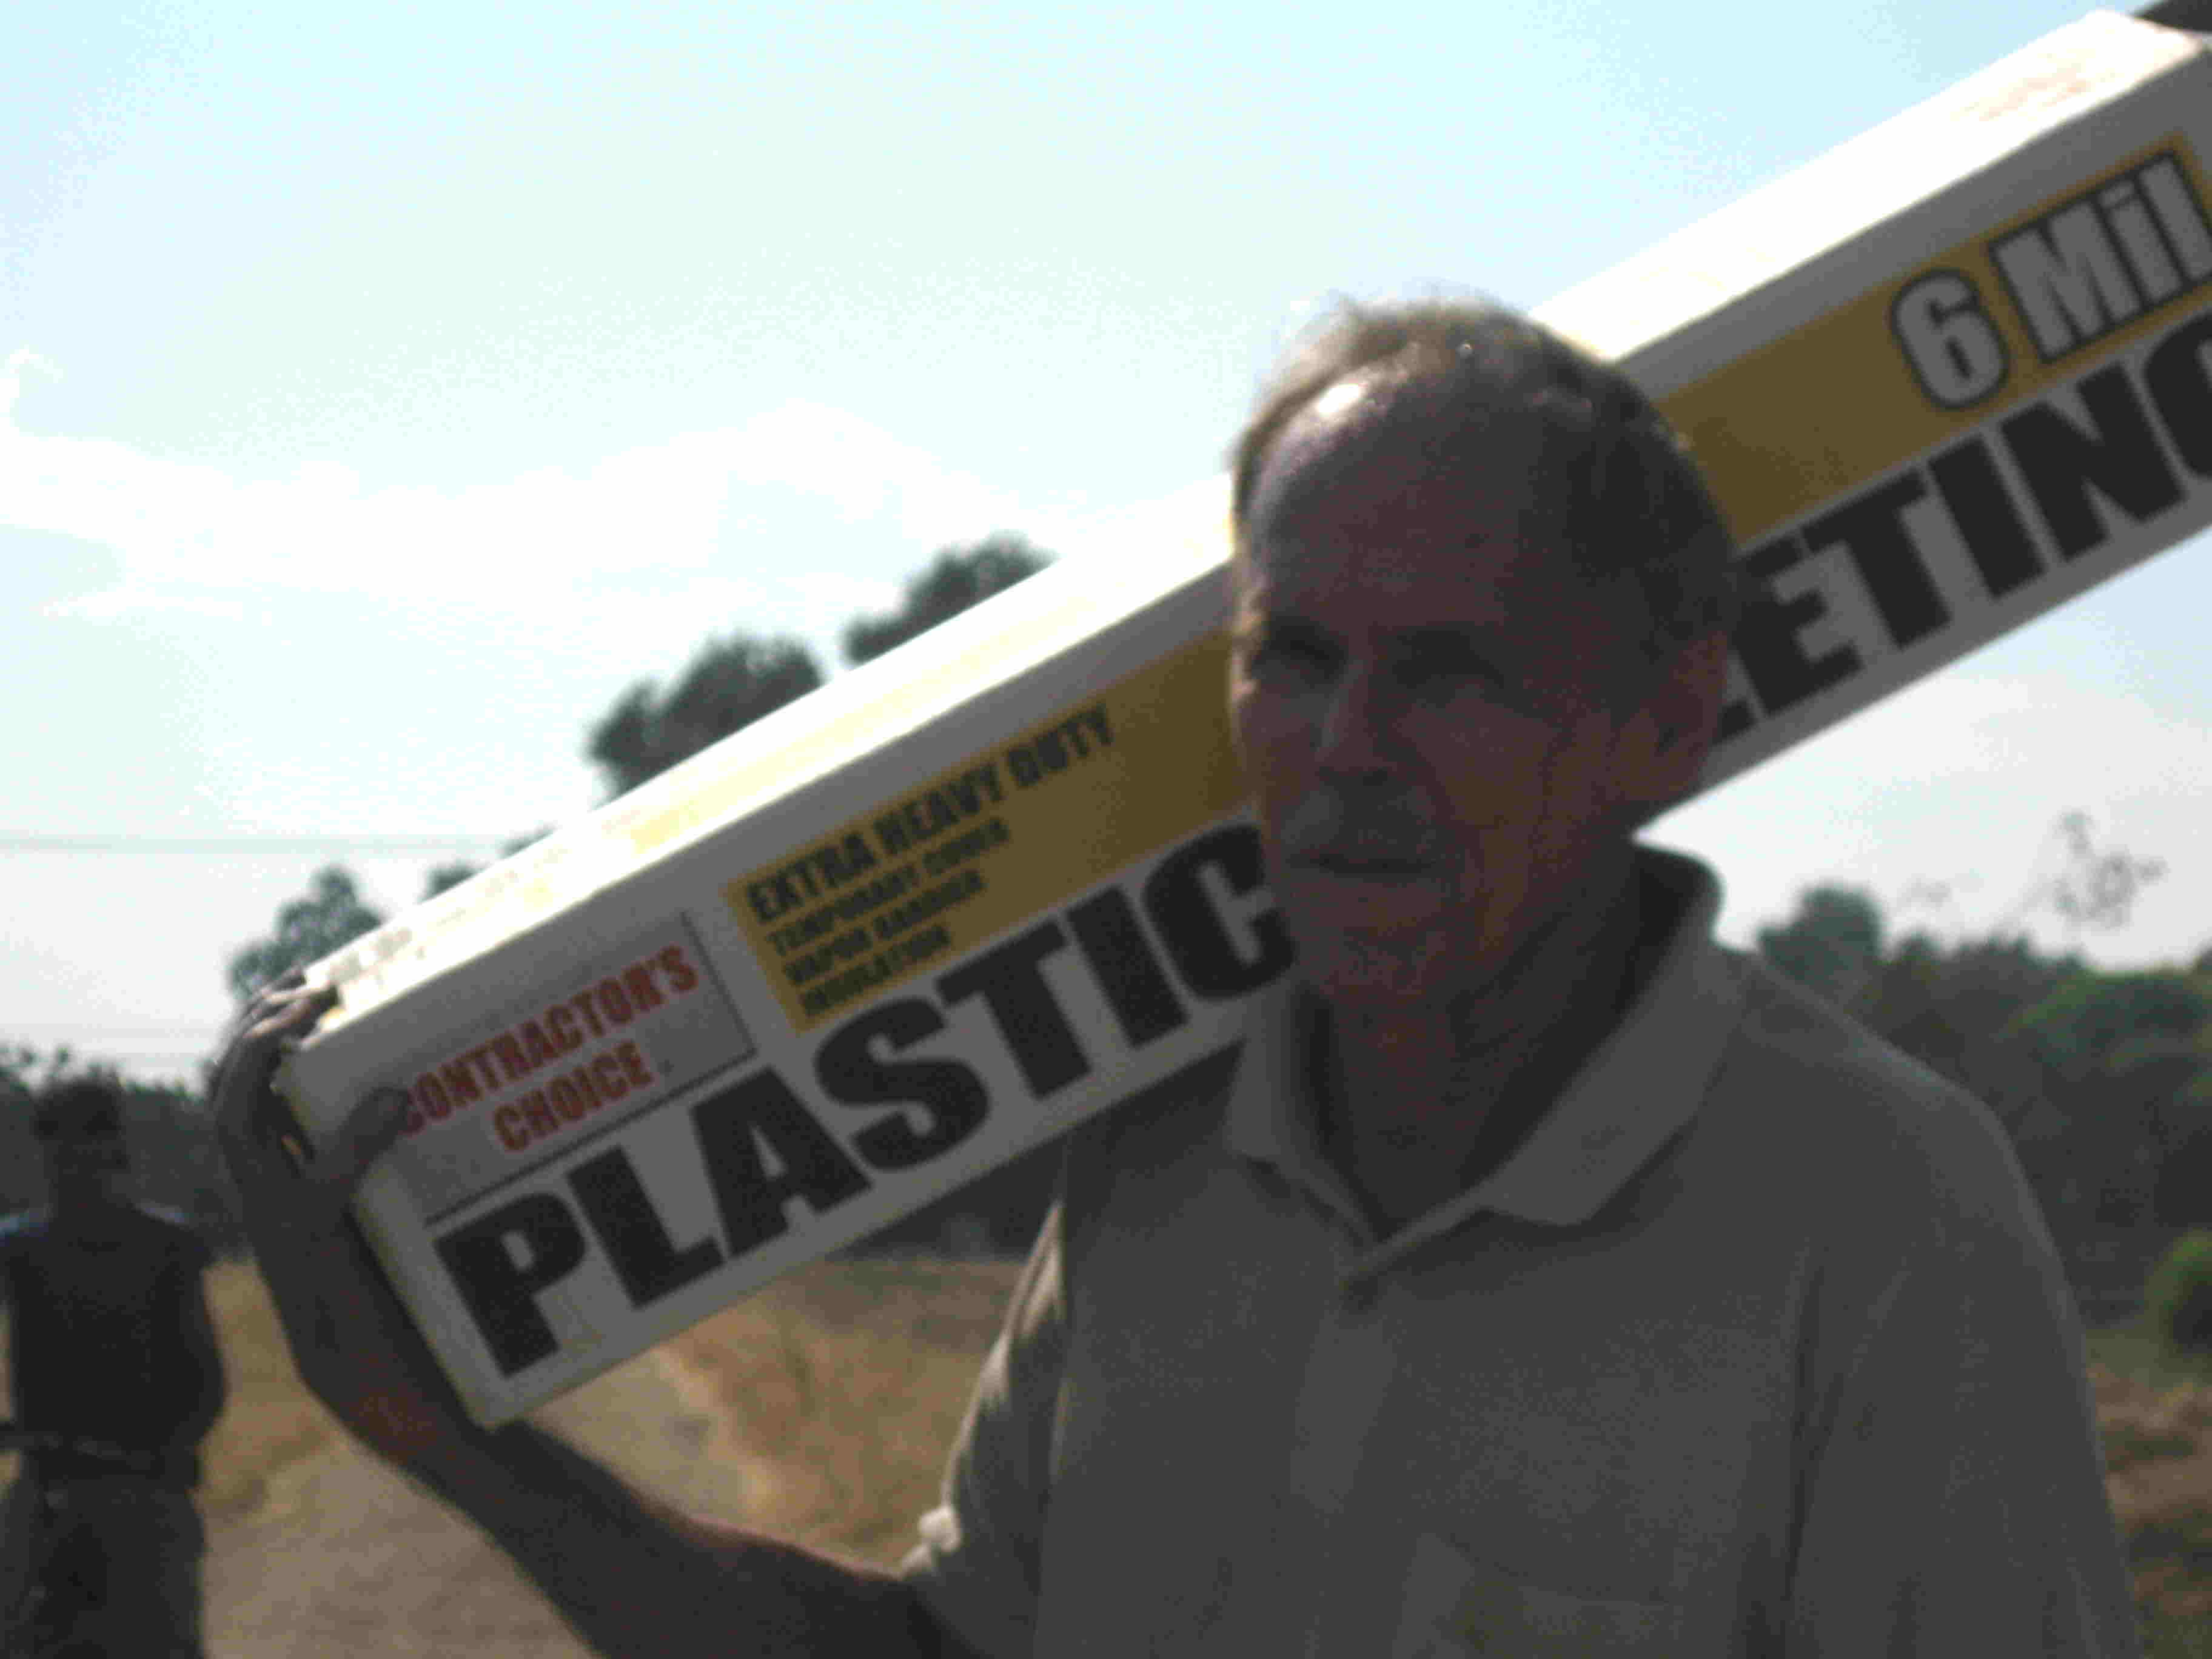
 Be
careful though, there has recently been some cheap junk on the market
that though marked as “black” is only a dark gray. I have found
that this material deteriorates rapidly in the sun. I have developed
the annoying practice of actually ripping an end open on a box to
check for a true black color before purchasing this plastic. If it's
actually black, I buy it, if it isn't, it's easier for the next
sucker to not become a sucker – caveat emptor!
Be
careful though, there has recently been some cheap junk on the market
that though marked as “black” is only a dark gray. I have found
that this material deteriorates rapidly in the sun. I have developed
the annoying practice of actually ripping an end open on a box to
check for a true black color before purchasing this plastic. If it's
actually black, I buy it, if it isn't, it's easier for the next
sucker to not become a sucker – caveat emptor!
The covering goes on in sections. Upper sections are pulled up under the horizontal struts, trimmed, and taped to the struts. The next layer is then pulled up under the same strut, trimmed, and taped in place. This creates an overlapping shingle effect that will prevent rain from entering.
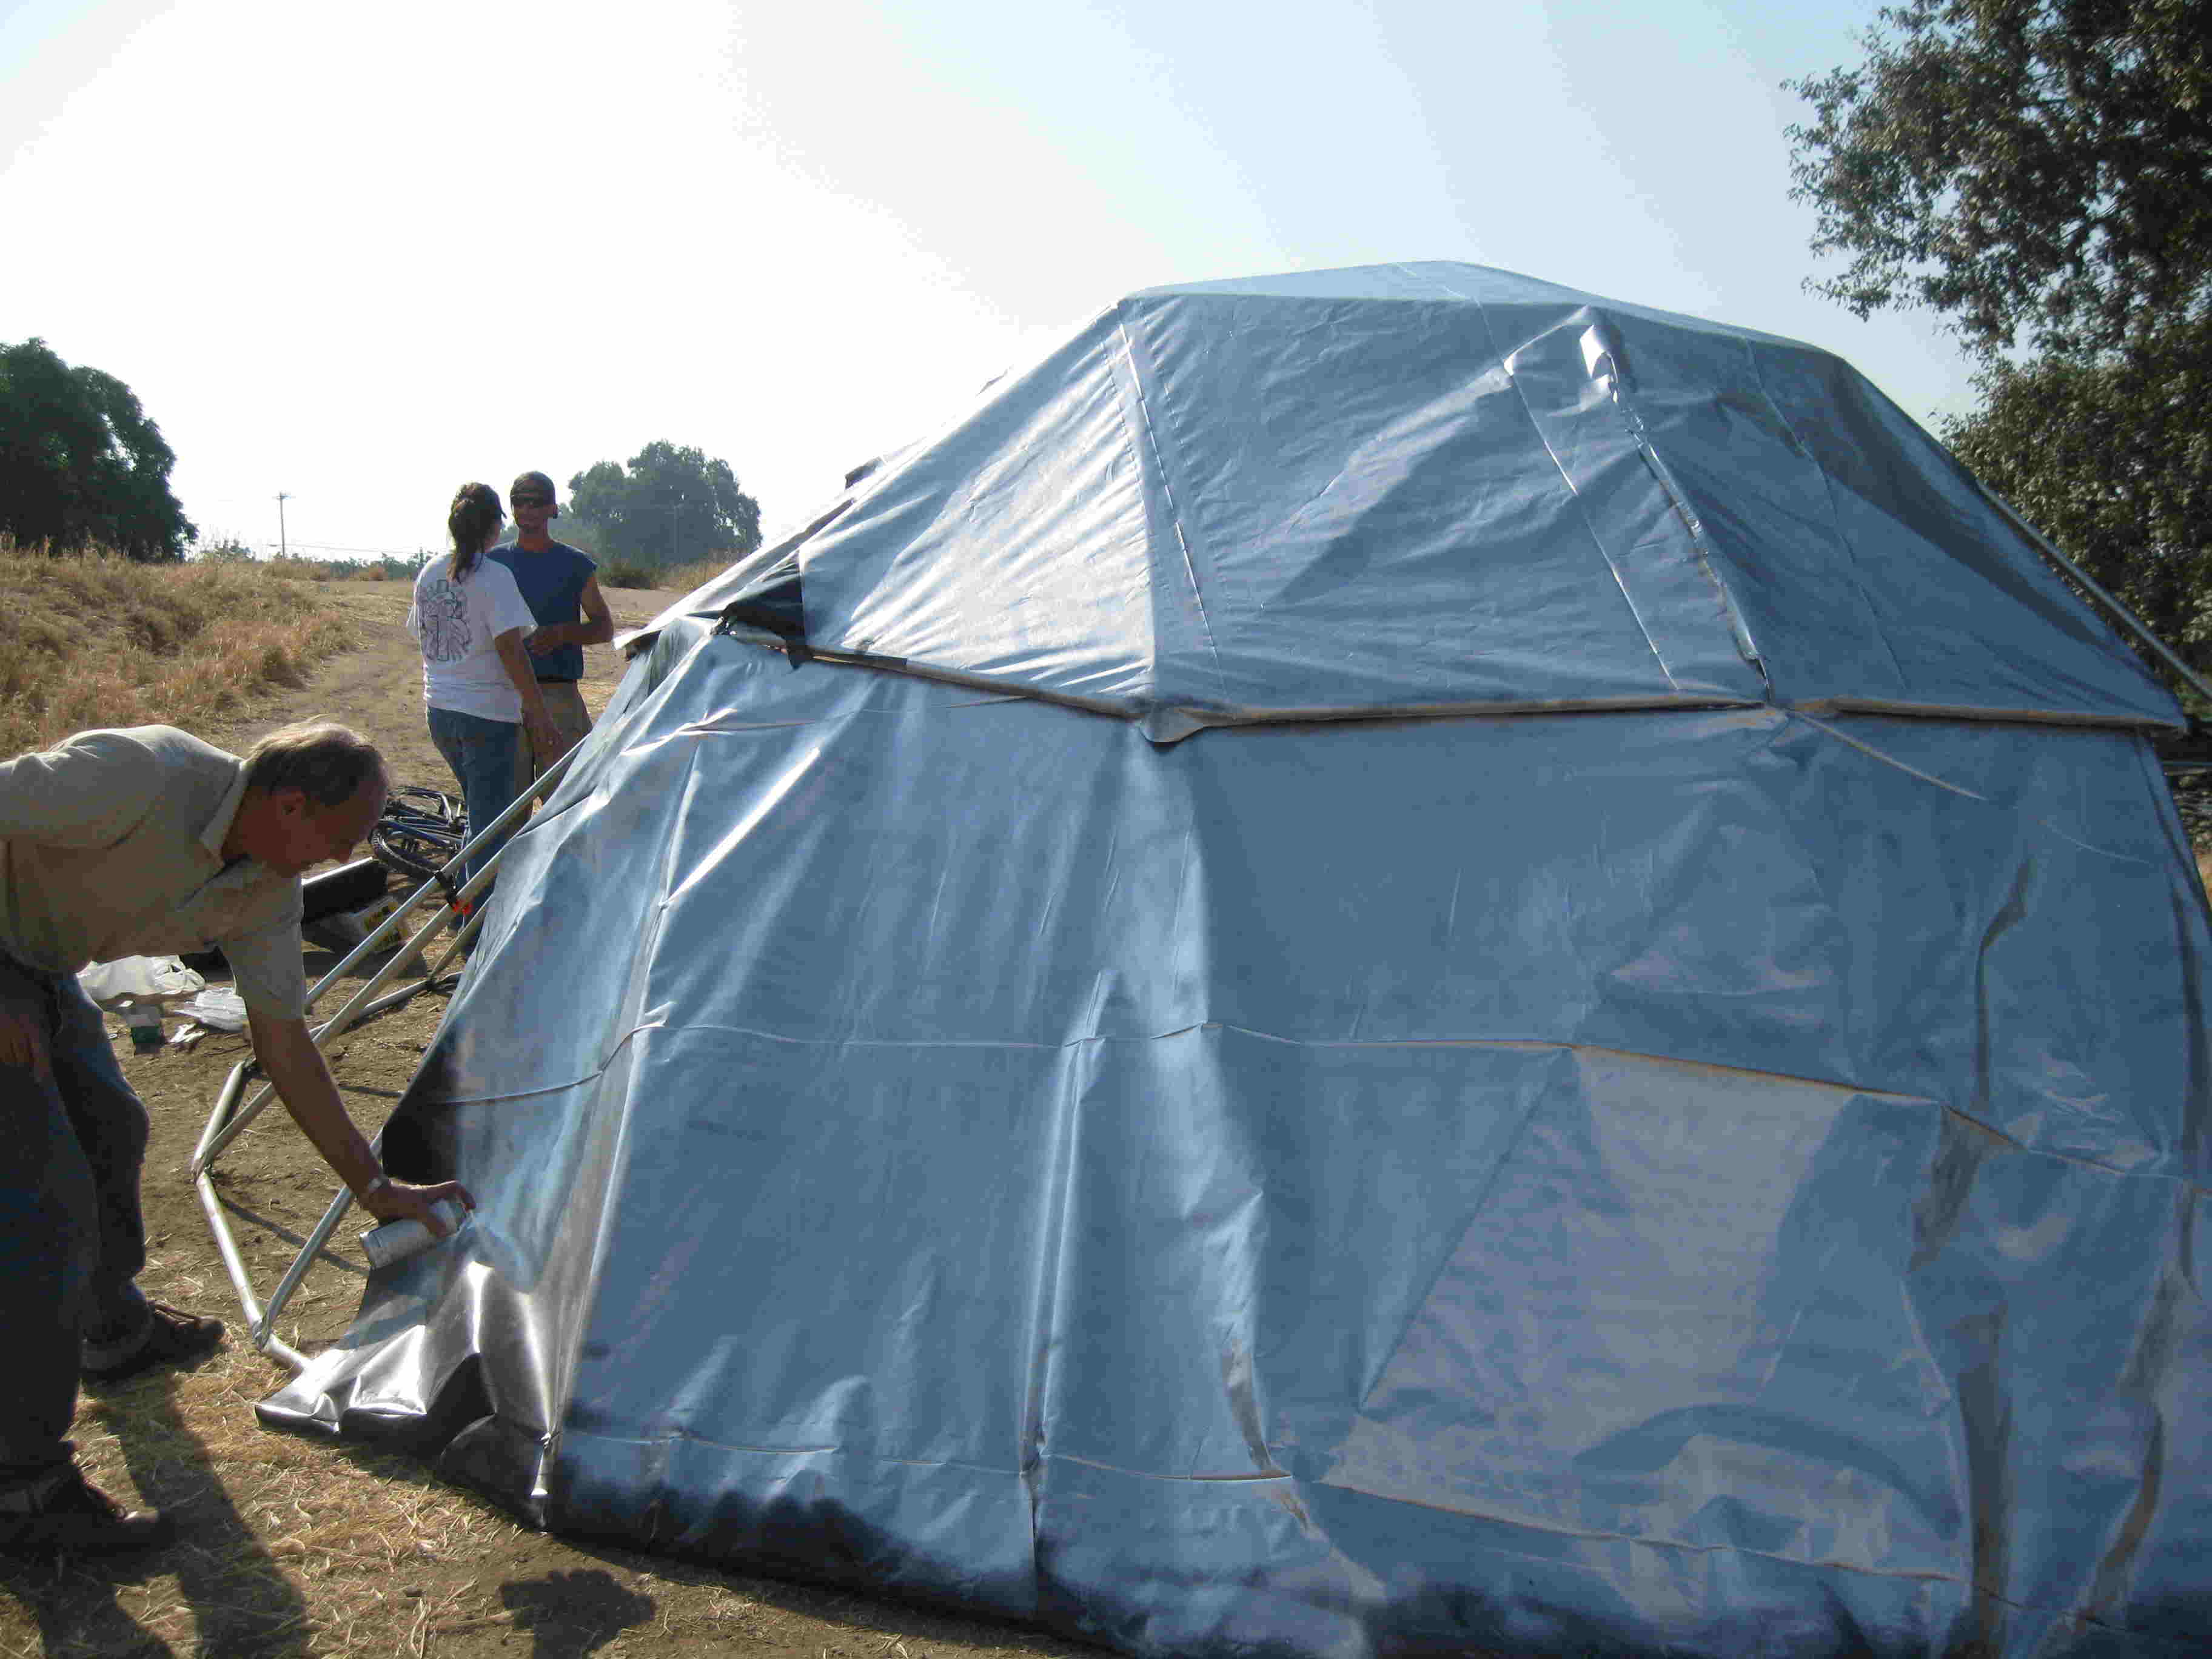
The outside surface is sprayed with a bright reflective paint. This will greatly reduce the heating from the sun, and give the plastic additional protection from it's rays. Make the coating as light as possible to minimize flaking, and because canned spray paint is expensive.
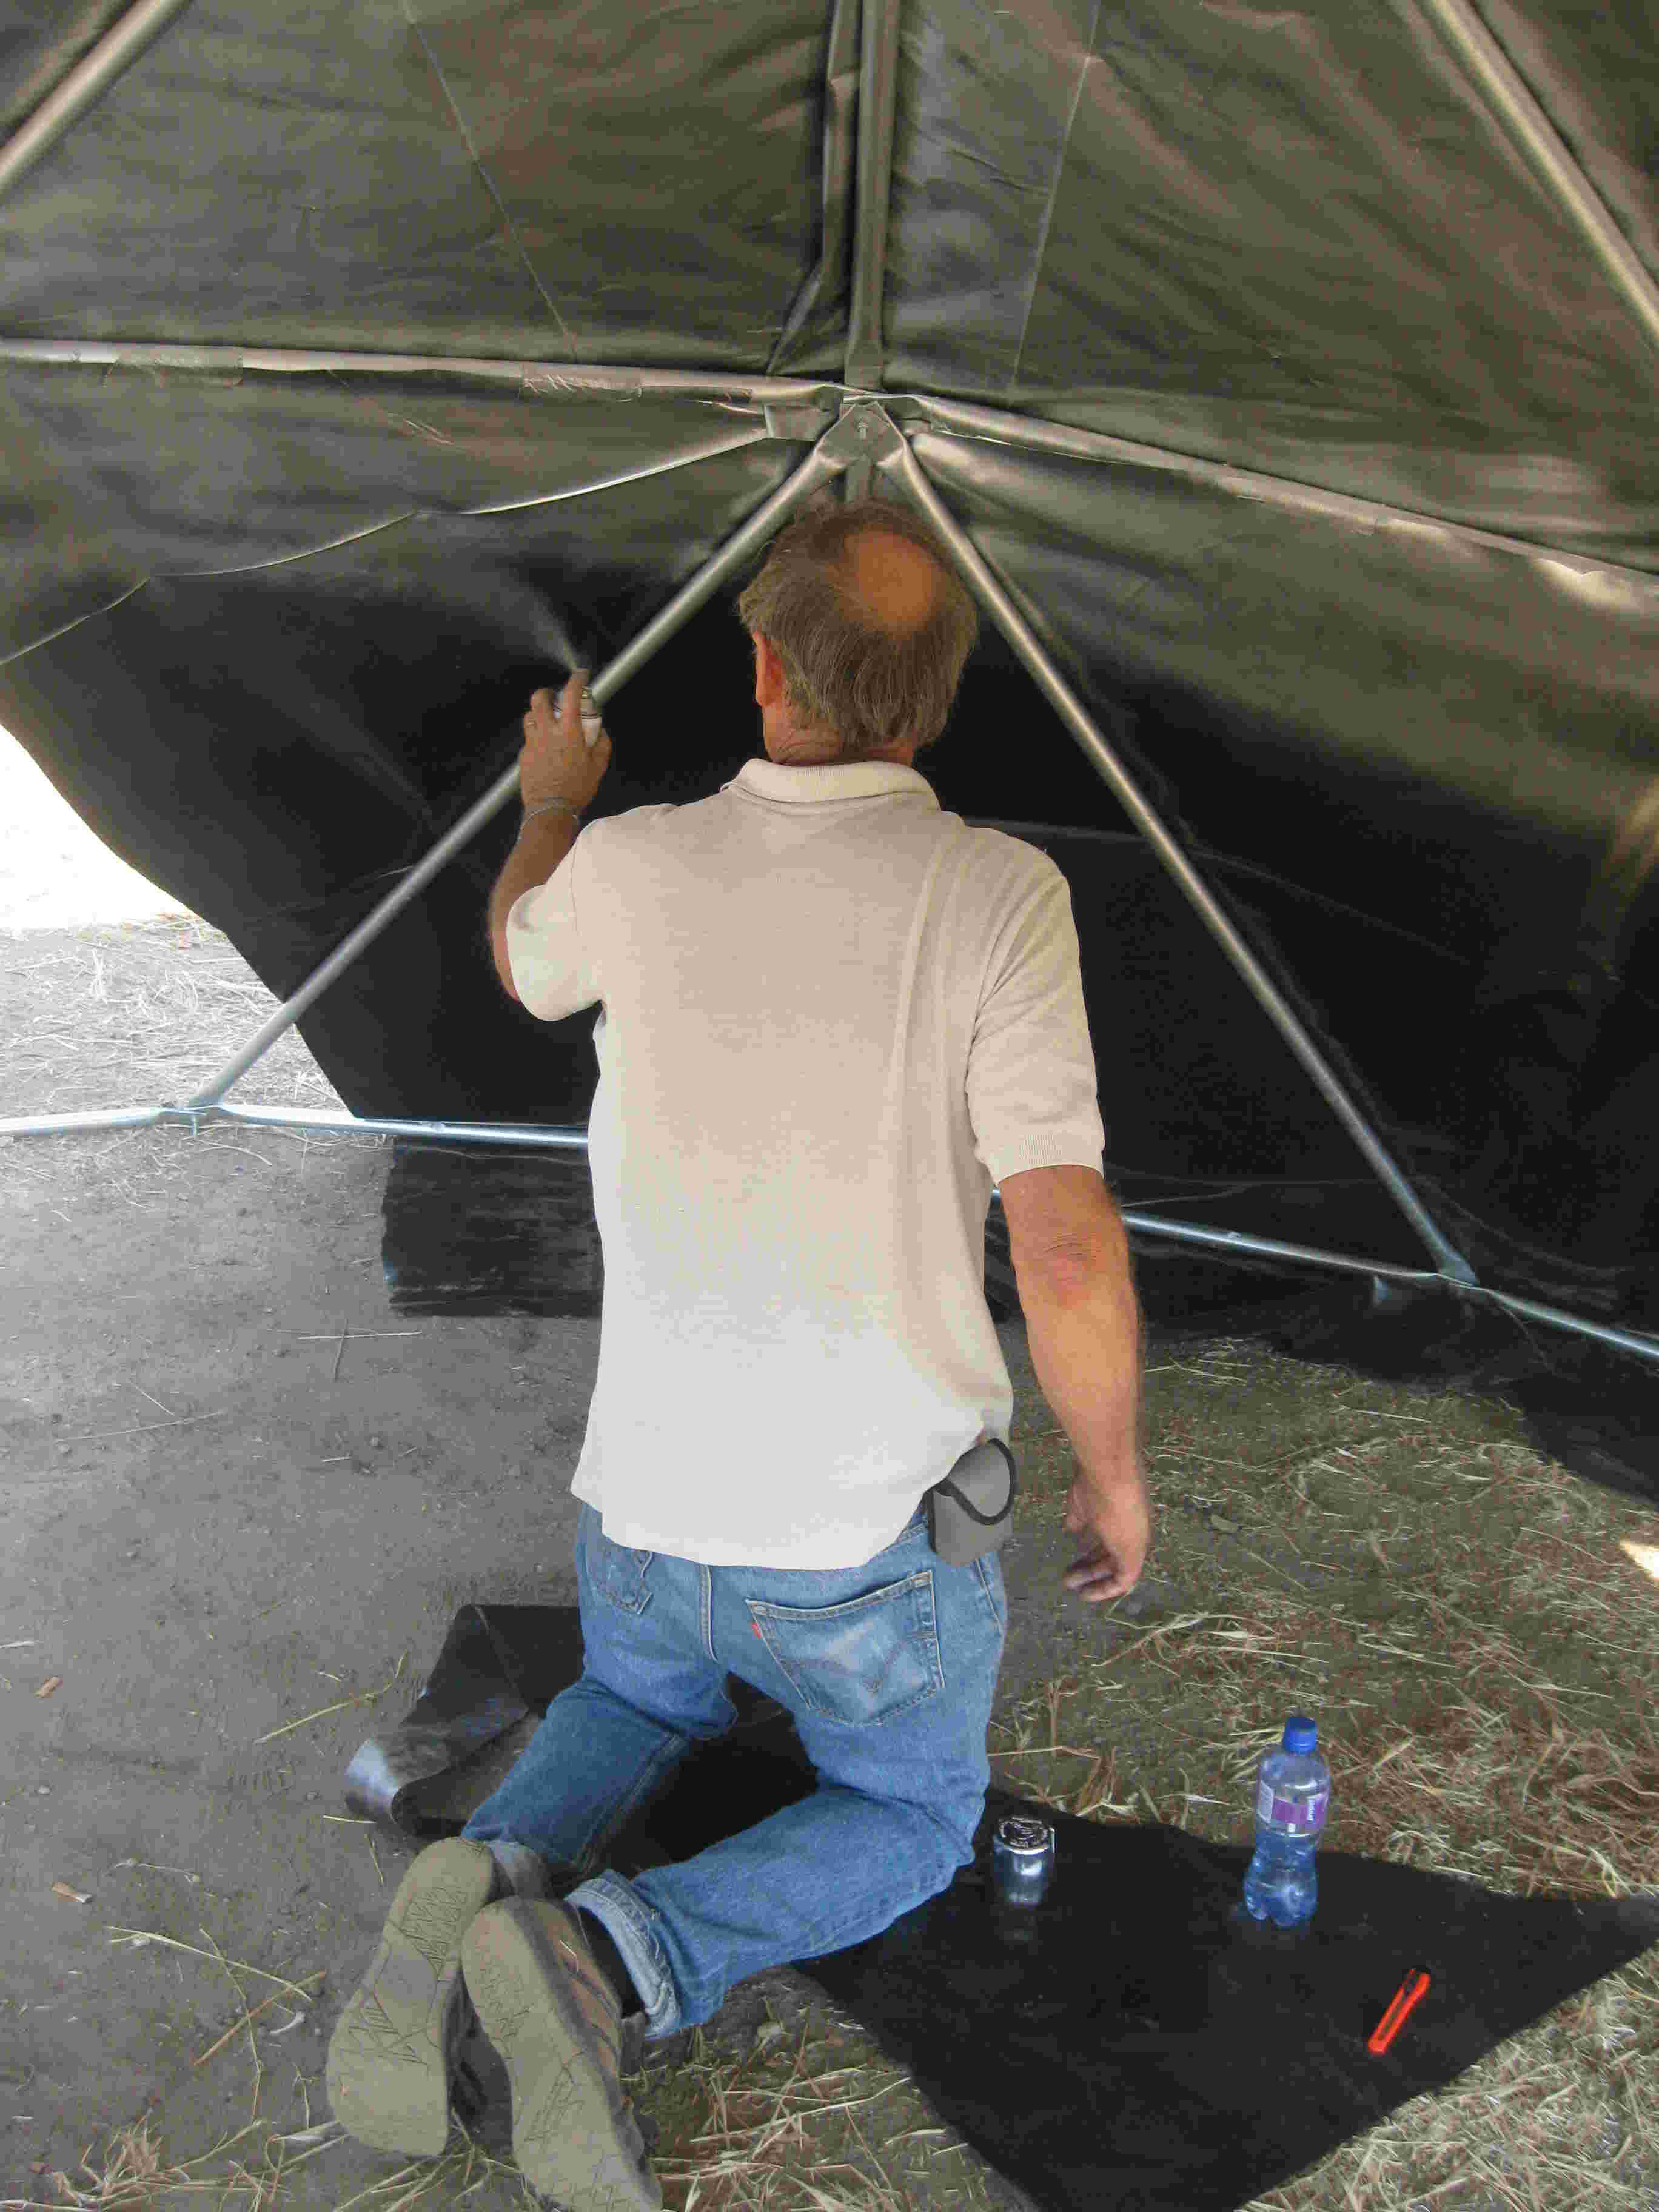
 The
inside is then coated as well. Aside from making it look less like a
cave, this prevents any heat that does accumulate from re-radiating
into the interior. All-in-all, when a partial covering is properly
oriented to the sun and breeze, this can be a comfortable place to
seek protection on a hot day.
The
inside is then coated as well. Aside from making it look less like a
cave, this prevents any heat that does accumulate from re-radiating
into the interior. All-in-all, when a partial covering is properly
oriented to the sun and breeze, this can be a comfortable place to
seek protection on a hot day.
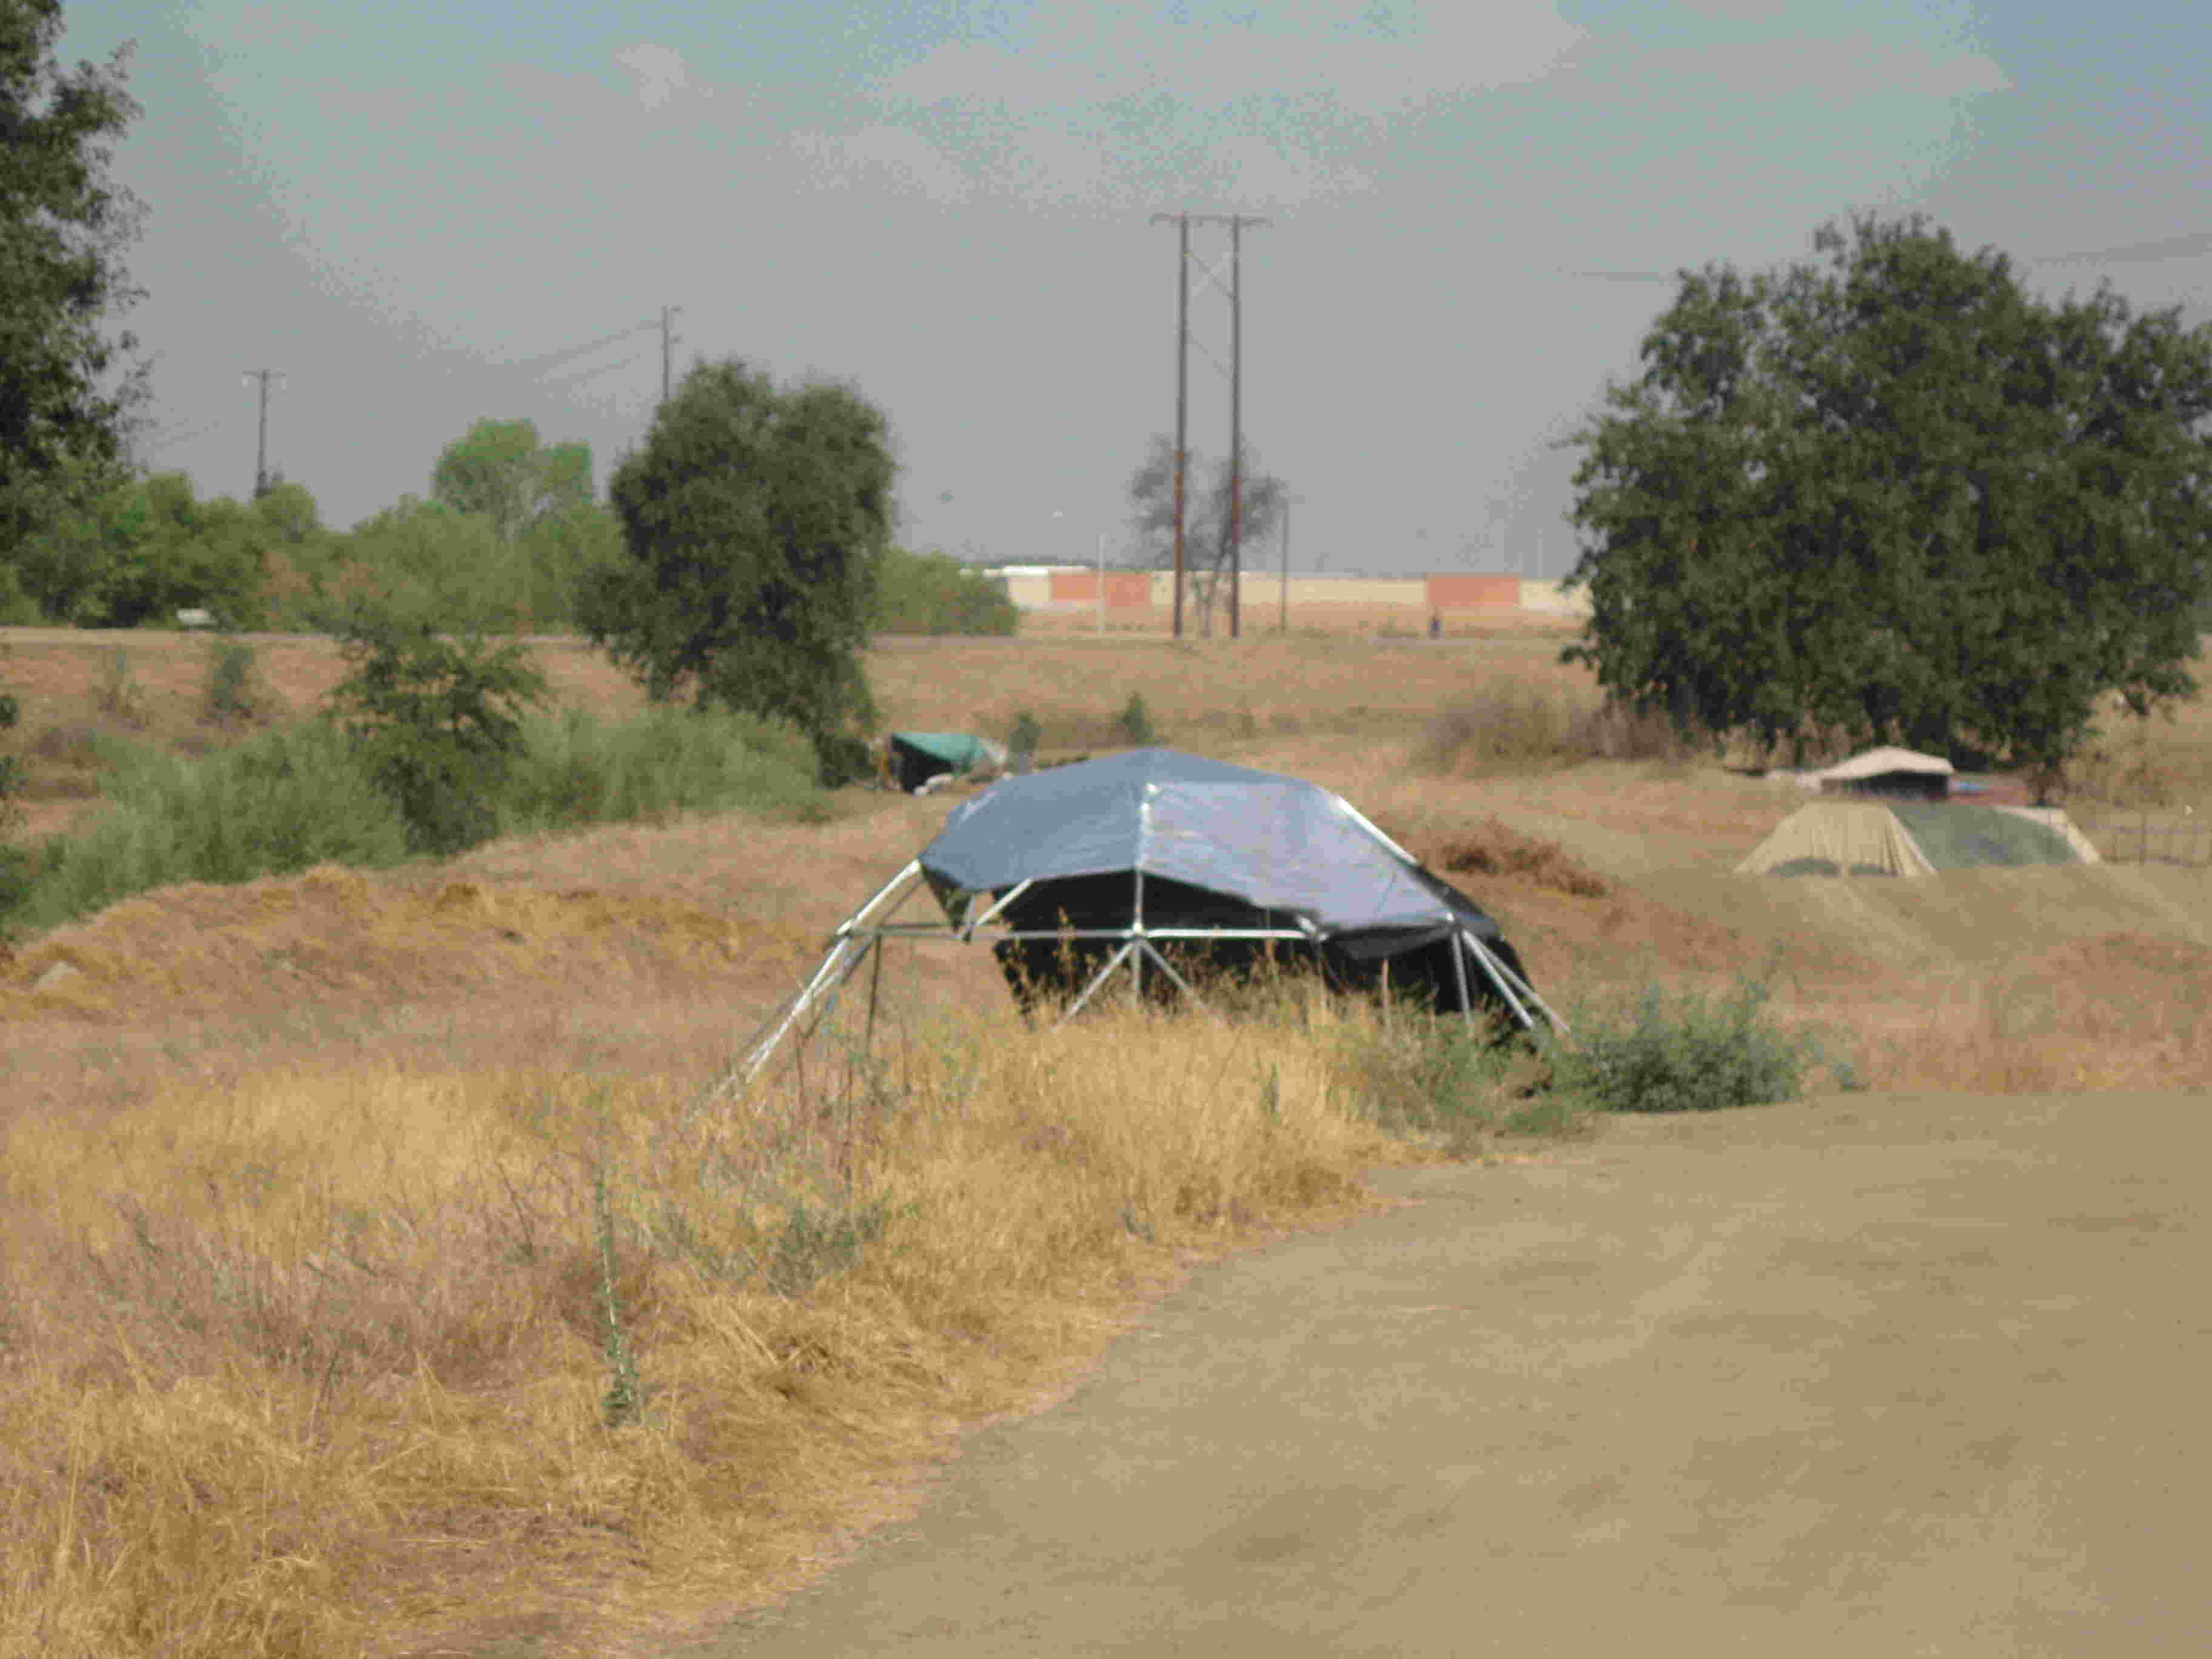
Be aware that you have a large structure that weighs very little, so it must be staked down or weighted with sand bags to avoid terrorizing the territory with a renegade kite.
16’
Bolt-Together Dome
R. Buckminster Fuller was a visionary born near the end of the nineteenth century. As a man concerned about the world’s shortages, he invented the geodesic dome as a means of enclosing large volumes with a minimum of material.
I first built this dome in the early seventies for about $50. Since then this structure has served as:
* Shade
* Hammock support
* Tent in various campgrounds
* Child’s swing support
* Bedroom
* Greenhouse
* Storage
* Shop
* Swap-meet shelter
* Garage
* Cement form
* $200 instant cash when a passing stranger wanted it bad enough.
This list is by no means complete, but it's a good start.
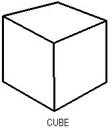
A solid object with all its surfaces the same shape and size is called a regular polyhedron. A few examples of regular polyhedrons are shown here:
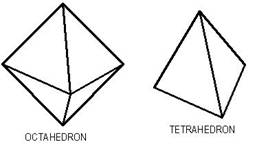
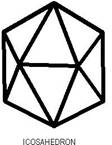
A geodesic dome is usually created by adding additional faces to a polyhedron. Since the icosahedron comes the closest to being a sphere, it is the one most often used for this purpose.
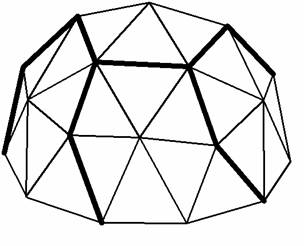
Picture a sphere just big enough to surround a polyhedron. Now stretch the center-point of each line so it touches the sphere, and connect these points with additional straight lines. It is important to note that length of these additional lines will be longer than the others (The darker lines in the dome illustration below represent the shorter lengths). Also notice, that their ends connect six lines, instead of the five-point connections of the original icosahedron.

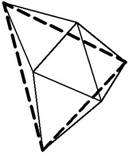
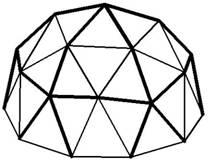
We have just created the simplest form of geodesic dome. If we wanted to get more complicated, we could now take the centers of each of these lines and project them to the sphere, and so on. For our dome, however, we’ll keep it simple.
The dome frame is made from 3/4" thin-wall conduit. It's 16' 8-1/2" in diameter, about 215 sq.ft. in area, and weighs about
130 lbs. Disassembled, it packs into a bundle of struts about 11" in diameter by a little over 5' long.
Twenty-six 1/4" X 1-1/2" bolts plus nuts are needed to bolt it together.
It requires two different strut lengths so I calculated where to cut a 10' piece of conduit so you would get a long one and a short one out of each stick (that is how it came out to 16' 8-1/2" diameter). You need five more long ones than short ones, so for the 65 struts required, you'll need to buy 35 10' sticks.
Cut each one 63-9/16" from one end, and flatten about 2" on each end of the two resulting pieces. I have found that about a 3-pound hammer and a stump or “biscuit” of wood makes an ideal pounder and anvil for this application.
MAKE SURE that the flattened ends are in line with each other, rather than twisted into different planes.
DO NOT use a driveway, concrete floor, or concrete anything else as an anvil. The repeated shock of even this hammer will begin to produce cracks far sooner than you might imagine. If you do happen to have a steel anvil available, make sure it’s in the middle of a wooden table, or otherwise isolated from any concrete slab.
Use a center-punch to mark a drill position in the center of each flattened area, about ½ inch in from each end. I have found that if you use a wooden backing, and drive the punch hard (almost through the metal) it takes a whole lot less time to drill the holes.
Drill a 5/32” hole in each end of each piece.
Bend the ends about 15 degrees in the same direction, so they will be tangent to the same 16’ sphere.
Coverings for this dome have included various forms of plastic, a parachute, wood, and even cement. One I’ve found surprisingly satisfactory is 6-mil black plastic lightly sprayed on both sides with aluminum paint. The aluminizing radically reduces the heating of the sun on summer days, and helps trap the radiant heat of a camp stove and bodies on a cool mountain morning.
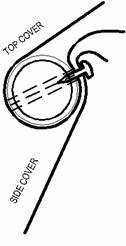
The method I find most versatile is to divide a covering of plastic or tarp into six pieces – one for the top, and five around the sides. The boundaries of these pieces are outlined by the heavier lines on the sketch below.
The covering pieces are attached by pulling their edges around the struts indicated by the heavy lines above, and hooking them on #10 x 3/4” sheet metal screws spaced 8” apart. Seven screws per strut, with the middle one centered, work out nicely for these lengths. The screws should be installed in the same plane as the flattened ends.
Five long struts will need these screws to secure the top cover, and ten short struts with screws will be required to run down the sides.
The edges of temporary coverings of plastic sheeting may be simply impaled on the heads of the screws. More substantial materials can be fitted with grommets.
When forming a two-dimensional sheet to a three dimensional surface, you’ll need to take up some slack around the edges. Fold the excess along one of the struts and secure on both sides with duct tape (unless you feel like sewing).
By overlapping the edges of the coverings as shown below, you can get a pretty good measure of protection from the elements.
In taking another look at the illustration below, notice that five short struts (indicated by the heavier lines) will join at the original points of the icosahedron. The other ends of these struts are joined by four long struts and one other short strut.
There may be a hundred different sequences for bolting this thing together, but here are couple suggestions to get you started.
Besides the struts – some with sheet metal screws preferably – nuts & bolts, it’s nice to have a few tools. Although a pair of 7/16 end wrenches can do this, a ratchet fitted with a 7/16” deep socket is a great help. If you bought carriage bolts instead of hex-head (as I prefer), you’ll need a pair of vice-grips to grasp the heads. Vice-grips are handy anyway, to help adjust errant strut ends, and to compress stacks of them while bolting. You should also have a hammer, something to stand on, and a friend.
1. Lay out a circle of ten long struts on the ground. This will establish the size and position of the finished structure, and leave you with only fifty-five more struts to worry about.
2. Build the dome up to the zigzagging ring of ten short struts (heavy lines) about four feet off the ground.
3. Connect additional struts to join a ring of five long struts near the top.
4. Join the remaining five struts with a single bolt into a spoke pattern, and handle this as a group.
5. Once everything is together, walk around the frame a couple of times adjusting the position of each of the ten connections on the ground to relieve stresses and conform to any irregularities.
6. Tighten everything down, and go around lightly tapping in all the sharp edges with your hammer, so you won’t tear your covering. I also like to add a piece of duct tape over each of the bolts to further reduce wear on the covering.
As you build it, aim the screws in the five long struts around the top, inward, and the screws on the short struts all towards the right. This will give you consistency and a water-shedding overlap when it comes to applying the covering.
This structure has quite a bit of volume for its weight, so under windy conditions so you might prefer to tie it down to terrorizing the neighborhood with an exceptionally large tumbleweed.
One very secure way of doing this is to flatten and drill one end of short (about a foot) pieces of tubing. Dig small holes under the connections on the ground, bolt on the short pieces, and cast them in concrete.
In one case, I dug a ditch about 6” deep around the perimeter and laid the bottom of the plastic in it. When this “skirt” was covered with dirt, it made a secure, draft-free seal.